Sunday 31 December 2017

Shadow War Campaign - Ambush and Hit & Run

Sorry it has been so long since my last update. I have still been gaming and painting, but with the run up to Christmas, I haven't found much time for updating my blog. 

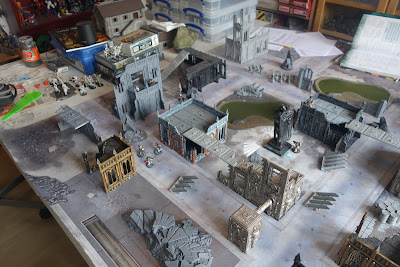
Having finished my last two Kill-Teams and with a free afternoon I wanted to get in as much gaming as I could. First up was the fight between my newly painted Tau and Ork Kill-Teams. I rolled the ambush scenario with the Tau as the attackers, which suited them pretty well given their superior firepower.


The Tau took up position in hiding. Most of the team deployed on the east side, with Shas'Ui Tas'Vou  and Ree'Va with his Rail Rifle deployed in the South, to try and catch the Orks in a cross fire.


The Orks were mostly forced to deploy in the centre of the field, but Sergeant Bogrot and Razan got lucky and were able to ambush the ambushers, deploying behind a wall just out of sight of Shas'Ui Tas'Vou.


The trap was sprung and the Tau got off to a good start, downing two Ork Yoofs, Mozz and Fuzzle and taking the third Yoof, Trug, out of action. Snagrip returned fire with his big shoota and managed to completely miss everything, only to be shot down for his trouble.


In the South, Razan and Sergeant Bogrot tried to spoil the Tau's fun, with the Sarge throwing a frag stikkbomb, which missed, bounced off a wall and damaged exactly nothing. Shas'Ui Tas'Vou took aim with his pulse pistol, and took the Sarge out of action with one shot. Ouch! Despite the loss of their leader, the Orks refused to bottle.


On the east side, Dagroll had gotten into cover and a futile exchange of fire with Tri'Spa and Ki'Ra


Unphased by Sergeant Bogrot being taken down, Razan charged into combat with Tas'Vou and, in the Ork's first bit of luck of the game, took him down and out. Meanwhile, Korporal Frix, having used the unfortunate Yoofs as a shield, snuck up behind Ree'Va and shot him in the back with his slugga.


In the North East, Fragrap broke cover to use his flamer. Stuck between a Tau and a drone he picked the drone, pinning it but causing no damage. Ki'Ra returned the favour by shooting him and taking him out.


Korporal Frix was quickly shot down by Tri'Spa, but Snagrip was finally able to make use of his big shoot to take out Gen'Tu and his Ion Rifle, while Razan finished off the downed Ree'Va in hand to hand. At this point, with 3 of their number including Shas'Ui Tas'Vou down or out of action, the Tau bottled. Although they were winning in terms of numbers, for the two, three Casualties was clearly too many.


In the end, the fight worked out quite well for both sides. Shas'Ui Tas'Vou and Gen'Tu made a full recovery and while Ree'Va had a miraculous escape. Clearly presumed dead by his colleagues he made his way through hostile territory back to the Tau's home base and gain extra experience for his trouble. The Tau gained 1 data cache and recruited a new pathfinder cadet, Net'Ra.

The Orks got 3 data caches, putting them only 1 behind the Sisters of Battle and Blood Angels. Sergeant Bogrot and Fuzzle both ended up with horrible scars which cause fear, which felt more like a help that a hindrance. I have to admit to being very tempted to try and model the scars on, but I don't really want to chop up my lovely old models. Corporal Frix ended up deaf in one ear, which most lead to him yelling even louder and complaining that the rest of the mob should stop frakking mumbling!

With this game done, every Kill-Team had played one game each, meaning we were at the end of round 1 of the campaign. For the next round I decided to randomise who would fight who, but not to allow any team to fight the same team it had fought in round 1. To do this, I put six different coloured dice in a back, one for each team and drew them out in pairs, returning them to the bag if I got any duplicate line ups.

This left me with the following combinations:
Blood Angels vs Sisters of Battle;
Tau vs Chaos;
Orks vs Dark Eldar.

Both the Tau and Orks had new recruits that needed painting before I could use them again, which left just the Blood Angels vs Sisters of Battle to play. I randomly rolled a scenario and got to pick myself. I went for Hit and Run, just because I hadn't played it yet, before realising just how well it fit the storyline.

After the first round, the Blood Angels and Sisters had the most data caches and so were closest to uncovering the location of Inquisitor Rudolphus' archive. Brother Sergeant knew his duty was to find the archive first and recover the gene seed of Brother Captain Bartolomeo, a Captain who had succumbed to the red thirst and whose body had been stolen by the Inquisitor for study. But attacking fellow servant sof the Emperor did not sit well with him. He decided to launch a lightning raid on the Sisters base of operation aiming to destroy their data store and get out inflicting minimal casualties. Of course the Sisters would not respond well to such provocation.

The random event rolls went very well for the Blood Angels. Sister Agnes got lost in the sump, leaving the Sisters one member down, while the Blood Angels got friendly territory reducing their chances of being injured. On top of that, the Blood Angels got six team members, meaning they actually outnumbered the sisters at the start of the game.

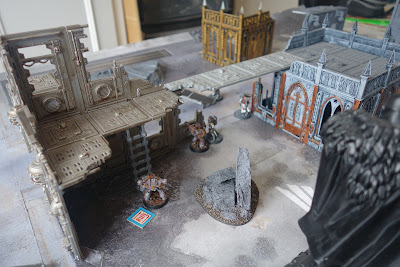
The Blood Angels deployed in the South and West, keeping under cover. This was actually pretty tricky as the sisters took the high ground and kept the field well surveyed.


Brother Fillipo climbed up the top of the Promethium tower to get a better firing position only to be almost immediately shot down.


On the West side, Novice Marco was also shot by Sister Ursula and pinned.


Just as Brother Sergeant Antonio was about to enter the fray, reinforcements arrived in the form of Sister Joan who let rip with her flamer, pinning him, but not wounding him.


Brother's Raphael and Fillipo and Novice Marco were all shot, leaving the West side clear.


But in the South Brother Michael came to Brother Sergeant Antonio's aid and shot and pinned Sister Joan.


Brother Sergeant Antonio then finished her off in hand to hand. But he had been badly delayed and most of the rest of the Blood Angel's were down or out.


Brother Raphael made a desperate gamble, taking advantage of his hip-shooting skill he broke cover and ran to try and take out the Sister's data cache, but missed.


Sister Superior Winifred then took him out in hand to hand. With all but two of the Blood Angels down or out and with the Sisters bruised but still very much alive, the Blood Angels voluntarily bottled out.


In the end, neither side came out of this battle with much of an advantage. Both gained one data cache, putting them on 5 each and both sides gained a scattering of new skills and profile boosts. The only significant loss was that Brother Michael ended up shell shocked, taking away the bonus initiative he had gained in the previous game, but he gained a point of ballistic skill by way of compensation.

Following the game, the Blood Angels recruited a new member, Novice Niccolo, while the Sisters spent the bonuses on equipping every member of the team with red-dot laser sights and handing out weapon reloads to as many sisters as possible.

This pretty much rounds up my gaming and the campaign for the year. I have a Tau and and Ork to paint, but once that's done, the second round can continue in earnest.

Wednesday 15 November 2017

Shadow War Campaign - The Tau and the Orks

What with birthdays and trips to Nottingham it's been a while since I last posted an update on my Shadow War project, sorry about that. But I haven't been idle and have finished my last two Kill-Teams.

The Tau are a bit of a cheat. When I started this project, the plan was not to buy any new models as I had plenty of old ones that deserved painting. I do actually have a Tau Fire Warrior squad but, not knowing much about Tau, I hadn't realised that the Tau in Shadow War are actually Pathfinders not Fire Warriors. I could have used my Fire Warriors to put together a team, as they do have the option for Pulse Carbines which Pathfinders use, but I wouldn't have had any of the right Special Weapons or Drones. Then, at small local Wargames show Valhalla, I stumbled across a box of Pathfinders for only £16 which seemed like a bargain, so I snapped them up.


The Pathfinders feature the full range of shooting options, including an Ion Rifle and a Rail Rifle and are accompanied by both a Recon Drone and a Pulse Accelerator drone. I even made use of my Fire Warrior box by pinching a hand with a pulse pistol for my Shas'ui. I reasoned that being the only member of the squad even approaching competent in close combat, it made sense to give him a bit of an edge and he didn't sacrifice much range to do it.

The Tau were spray undercoated with Army Painter Wolf Grey and highlighted in Vallejo Wolf Grey (clearly they have much lighter coloured wolves in Vallejo's part of the world). The highlights actually came out much stronger than I intended, but I like the effect. I think it gives them a cartoonish feel, which suits their slightly Anime inspired design. The black areas were Vallejo German Grey, highlighted with Dark Grey while the skin of the Shas'ui was Vallejo neutral grey higlighted with light grey. Given they amount of blue I was using I didn't want to give them blue skin and I saw no reason why Tau shouldn't have varied skin colours like humans.


I rather like how these have come out and it has me tempted to put together a larger Tau force for Warhammer 40,000. The start collecting box seems like pretty good value.

Anyway, now we turn to almost the principal reason for this project, the Orks.

I have been a 40K Ork collector longer than anything else and what really got me into them were Kev Adams incredibly characterful sculpts from Warhammer 40,000 1st and early 2nd edition. Back then, Ork background was based around the six major Ork clans. Space Marines had their chapters, Eldar their Craftworlds, Imperial Guard their regiments and Orks their clans. Virtually all the models were clan specific and had huge amounts of personality. The Orks were also much lighter in tone than the rest of the 40K Universe, with lots of daft humour that was well captured in the models.

I collected Orks through late 1st and early 2nd edition by which time Kev Adams had left Games Workshop. GW initially got other sculptors, mostly Alan and Michael Perry and Gary Morley, to imitate Kev Adams style, with varying degrees of success, until Brian Nelson came along and pretty much redefined the look of GW Orks, making them bigger, meaner and more bestial. I actually like Brian Nelson's style, but they never had the same level of personality as the Kev Adams sculpts. Plus, in 3rd edition 40K GW all but dropped the clan concept and my interest in Orks waned.

Recently, the clan concept has been sneaking its way back in and found it's way into Shadow War by defining the Skills that Ork Kill-Teams can take, in much the same way as the Space Marine chapters and the Imperial Guard regiments. This seemed like the perfect time to dig out my old models and give them the attention they so richly deserved.

For my clan choice I went with Blood Axes, sneaky gits who copy humans and even wear camouflage (though they don't really know what it's for and like to use bright colours). I picked them mostly because I had some models I wanted to use but their sneaky approach to warfare perfectly suits Shadow War.


These three Youths are a mix of metal and plastic. Back in the early 90s, Games Workshop were really into using seperate plastic arms on their metal models to give you more posing options. The two Orks on the left are of this type, metal models with plastic arms and weapons. The one on the left is an offical Blood Axe Ork boy, while the one in the centre is, technically a mad boy, though I thought his little shorts and tongue hanging out gave him a sort of boyish enthusiasm appropriate for a Yoof. The Ork on the right is entirely plastic, from the Space Orks boxed set, one of several multi-part plastic sets from the early 1990s which, in retrospect, feel somewhat ahead of their time. It was only after I got them altogether that I realised they were wearing matching hats.

For the black areas I stuck with my German Grey/Dark Grey combination. For the Green uniforms I used Vallejo Yellow Olive Highlighted with Russian Uniform WW2. The camouflage areas are old GW bubonic brown with Prussian blue stripes. The Ork skin is Vallejo Goblin Green with a GW Thraka Green wash and highlighted in Vallejo Golden Olive. Initially thought this would be too light, but I actually like how it has come out.


The two Ork boyz are actually Blood Axe Kommandoes and are not Kev Adams sculpts, but are by Alan Perry. I like them anyway and I think they're slightly serious, no funny business, look is quite appropriate for two profeshunals. I used them same colour combinations as for the Yoofs, but with more emphasis on the camouflage patterns, which seemed only appropriate for Kommando fatigues.


The Orks on the left and right are Spanner boyz, specialists with Heavy Weapons. They are both originally Mek Boys, but their techie look seemed appropriate for Spanners. The one on the left has a Big Shooter. The one on the right presented me with a problem. He is clearly carrying a Flamer, but that isn't an option for Orks. I initially thought of counting it as a Rokkit Launcha, but that felt silly and there was no way I was leaving that lovely old model out, so I decided to house rule it and let him have his flamer. I doubt it will unbalance the whole campaign and he probably stole it from an Imperial Guardsman, which is appropriate for the Blood Axes.

The Ork in the middle is technically another Boy, but the model is a Blood Axe Nob, so I decided to make him Sergeant Bogrot's second-in-command and equip him with a bus chopper to show his superior Rank. He is clearly very pleased with himself.


Finally we have Sergeant Bogrot, my favourite Ork in the team and one of my favourite models of all time. Originally and Blood Axe Warboss, he has been slightly demoted for the campaign, but his Big Choppa should stand him in good stead. I felt I had no choice but to paint his big coat in black, but I stuck to the Team colours on his hat and his coat cuffs.

I am really pleased with the painting on both of these squads and, as soon as possible, I will pit them against one another and post the results. Watch this space.

Sunday 22 October 2017

A weekend away

Last weekend I took a trip to Nottingham for Warlord Games 10th anniversary celebratory bash at their Headquarters. I had wanted to go to their Beyond the Gates of Antares event early in the year but time and other commitments got in the way, so when this event was announced I jumped at the chance.

I had booked my event ticket for Sunday with the plan to travel up on Saturday and come back Monday. I always avoid travelling on a Sunday if I can because the trains are so unreliable. In the end I managed to catch a slightly earlier train than planned which gave me some extra time on Saturday afternoon, so I took quick trip to Warhammer World. The last time I had been there was in 2008 and, at the advice of the person in the Tourist office, had taken the bus, this being in the days before Google Maps on your phone. I hadn't realised that Warhammer World is actually only a thirty minute walk from the town centre, most of which is along the canal which was rather pleasant.

 Just the atrium
One of a great many huge dioramas

The main exhibition space had grown a lot since my last visit, though they now expect you to pay to get in. I think it was worth it, the place is stacked with an enormous and very impressive dioramas most of which were built for the exhibition. But it also had a few classic pieces, such as Mike McVey's Warhammer Quest and Emperor and Horus dioramas. There were also enough classic models to make me go all nostalgic. I spent the better part of an hour getting pictures of just about everything. As Warhammer World stays open until 10pm on Fridays and Saturdays, I had ample time to wander around both the main shop and the Forge World shop and still got a bottle of Bugman's XXXXXX in the bar.


Some classic dioramas

Warlord's HQ is also about thirty minutes from the town centre though in a different direction. The walk was a touch less picturesque, but a bit more varied taking in the Nottingham suburbs. The event was structured like a small scale version of Games Workshops old Games Day events. There was a large central hall with plenty of demo games, including Warlord's big name games like Bolt Action and Black Powder, as well as more recent offerings like Test of Honour and Blood Red Skies. Rick Priestly was there demoing "Fantares" his reworking of the Beyond the Gates of Antares rules for fantasy, currently using North Star's plastic dwarfs and gnoll. Studio painters and sculptors had some space and were answering questions. There was also a program of seminars, some special offers in the onsite store and tours of the production facilities. Warlord had invited a few other companies along, including River Horse, North Star, Ainsty casting and Mantic Games who all had stands and a few demo games as well. Plus all attendees got a free miniature of King Arthurs confrontation with the invincible Black Knight.

 Fantares in action

Between the guided tour and the seminars I attended (one with Rick Priestly and Tim Bancroft and on Beyond the Gates of Antares and another with John Stallard and Paul Sawyer on the future of Warlord in general), I picked up a lot of information summarised below.

  • -The building in which Warlord are based used to be the corporate Head Quarters of Raleigh Cycles and incorporated their production facilities. When Raleigh moved production to Vietnam in the 1980s, they moved their HQ down the road. For a while the building was a council office before being rented out to business. Warlord have always been based there, but have slowly taken over more of the site. It is most useful because it has workshops they can use for production which have to be kept separate from ordinary offices for health and safety reasons.
  • Warlord do all their resin and metal casting on site, but their plastic production is done in London. They don't have the space for the plastic casting machines.
  • Metal casting is a two stage process, both involving a silicon mould. An initial mould is made using the masters which will either be 3D prints or physical sculpts. This mould is made from silicon than vulcanises at a lower temperature to avoid damaging the masters. New sculpts will be cast from this and these will be used to create production moulds with silicon that vulcanises at a higher temperature.

Moulds for metal models. The green vulcanises at a lower temperature. 
The colour is added so you can tell them apart

  • Warlord's metal contains trace amounts of lead, which makes it more malleable and easier to work. The exception are their Doctor Who miniatures which must be lead free at the instructions of the BBC.
  • The BBC also dictates why the Doctor Who miniatures are an unusual scale. Their licence precludes "co-mingling" which is to say selling one of their ranges of the back of another. They can't make their historical miniatures mix too easily with the Doctor Who. The slightly larger scale also makes it easier to sculpt "photo-realistic" miniatures which can be necessary as the actors have to sign off on uses of their likeness (which may also explain the odd release schedule for some miniatures).
  • Warlord's casting machines are mostly second hand Games Workshop machines which they sold off when they switched to fine cast.
  • Warlord's resin is a custom mix, they do not use polyester. The intent is to add a slight plasticity so that, in theory, it will bounce rather than shatter if dropped. They also add a grey colouring agent which they think makes it look nicer (I agree).
  • Resin mould's are made from silicon, poured over the masters in liquid form before being allowed to harden. The moulds are good for about 20 - 60 casts depending on the model.

Resin "Hinge" mould, so called because you have to open it remove the model
  • A Beyond the Gates of Antares website will hopefully be launched at the end of the month, it will be called the Nexus. It should feature all the articles from Warlord's website (which Rick Priestly thought was impossible to navigate) as well as living errata and FAQs and the living army lists. It will also incorporate a community section and allow for community material.
  • A new supplement will be released in March or April of next year. This will be focused on an enormous wrecked space ship (a hulk in space, if you like) and will introduce a new faction. This faction are ancient drones that were defeated in the distant past, but have reawakened and are travelling on the ship, dropping off copies of themselves on planets as they go. Both the Concord and the Isorians have boarded the ship looking for the source of the drones. Caught in the middle are a faction of Ghar refugees trying to avoid both the Ghar Imperials and the Rebels. The book will incorporate rules for fighting in confined spaces.
  • Alien mercenaries are on the way. These include a vaguely insect like species and a predatory bounty hunter species who are accompanied by trained animals. These should be out in time for Christmas.

 Soon to be released Antares miniatures.
Isorian Drones, Boromite Hauler, Isorian bikes and prototypes of the new aliens

  • Warlord are working on a game for World War II Torpedo boats. This is very much John Stallard's project and he believes it hasn't been done well before.
  • A new edition of Black Powder is on the way, it is Warlord's most popular game but Paul Sawyer is off the opinion that games need a refresh every five years or so.
  • A Pike and Shot supplement for Samurai is in the works, along with other things. Many of these book are released as and when they are ready as they are written by freelancers who have day jobs.
  • They are not working on anything for the seven years war. Paul Sawyer admitted that most of what they produce is driven by someone in the design studio having an interest in it and, currently, no-one in the studio is much interested in that period.


Overall, it was a fun day that packed in a lot and has may very keen to take a return trip to Nottingham some time next year.

Tuesday 19 September 2017

Shadow War Campaign - Dark Eldar and Blood Angels

It's been too long since my last update, but I have been working on my Shadow War project, it's just that a series of busy weekends, and a short break in Wales, have gotten in the way of updating the blog.

Anyway, I have finished off two more Kill-Teams and played one more game. The models from both of these teams date back to Warhammer 40,000 3rd edition. When it was released, I bought the boxed set, with its Space Marines and Dark Eldar. I tried expanding both sets of models to full armies. I didn't really get anywhere with either of them, but still have some of the models lying around.


The Space Marine Scout Kill-Team are metal models that were released just after 3rd edition. The current plastic scouts have the basic design, in my opinion, not executed as well. The current ones are a bit blocky and cumbersome. Their faces, in particular, are very square jawed. The old metals are much more fluid and elegant models, probably because they were sculpted as single pieces and not as a collection of parts.

I painted them as Blood Angels because my original army was supposed to be Blood Angels and I had the transfers. I stuck pretty closely to the colour scheme in the Shadow War rulebook, but tried to add some diversity in skin tones. It's a bit daft to suggest that in the 41st millennium everyone will be a uniform shade of white.

Generally, I think the more recent Dark Eldar models are a huge improvement over the originals, but I will make an exception for the Wyches. The new sculpts don't have the energy of dynamism of Chris Fitzpatrick's original, comic book style versions. I've had lots of them sitting around for years, neglected, so it was great to have an opportunity to put them to use. I stuck to a pretty straight forward purple and black colour scheme, with some deep red for hair. A pretty classic Dark Elf look that translates well to 40K.


I'm pretty happy with both of these Kill-Team. They're some of my sharpest and cleanest painted models (though the black backdrop I've started using for my photos helps).

Having finished both teams, I didn't waste any time in trying them out. For my second campaign game I played the Scavenger scenario. 6 loot counters were scattered across the board. For each counter held at the end of the game, roll a dice, a 6 got the team an extra data cache.


With hindsight, I played the Dark Eldar spectacularly badly. I split them into three groups and had them run, using their higher speed to grab the loot counters as fast as possible. The Syrin, the Team Leader, got first blood, shooting down one Scout. Unfortunately, I left them dangerously exposed and they were shot up by the Scouts with their superior range.


Instead I should have had them make use of cover to get them into charge range and deal with the Scouts hand to hand. After the last game in which both sides blasted ineffectually at each other, I clearly forgot that Kill-Teams that aren't even fully dressed, let alone fully armoured, are not immune to bullets.

 Sorry for the blurry picture, I think my camera flinched

Fortunately, the damage done to the Dark Eldar by my mishandling wasn't severe. Only two went out of action and both came away with "injuries" that were actually pretty beneficial. One ended up hating the Scout Sergeant and the other with fear-causing horrible scars. A few other Wyches gained some skills or profile bonuses and the team recruited a new member, a regular Wyche with a splinter pistol.

Ouch


The Scouts, however, did very well for themselves. As well as rolling a maximum 3 data caches for winning, they also got a bonus cache from the loot counters and most of them picked up bonuses of one sort or another. Rather than recruit a new team member, most of them picked up red-dot laser sights to improve their already pretty impressive firepower.

By way of an apology for the delay, here is a quick preview of my next Kill-Team. Still a work in progress.

Monday 7 August 2017

Shadow War Campaign House Rules

We previously established that the Shadow War rules are exactly the same as the old Games Workshop game Necromunda, right down to the wording. However, the campaign rules, which allow your Kill Team to gain experience, acquire new equipment and recruit new members over a series of games, are somewhat different. For the most part, Shadow War simplified them, for better or worse.

As a proud owner of the original Necromunda rules, I had the choice to either follow the Shadow War rules or to import some, or all, of the campaign rules from Necromunda. To help make that decision, I summarised the differences between the two sets of rules in the table below.


Shadow War
Necromunda
Campaign
Subplots Each side rolls on a 2d6 table at the start of the game. Not Used Shadow War
Injuries D66 table. 1/6 chance of death D6 table. 1/6 chance of death Necromunda
Advancement 1 nominated fighter gains an advance after each game. Roll on a 2d6 table, favouring skills. After 3 games, a new recruit becomes a trooper. Fighters gain experience according to the mission. Once passing a set threshold, a fighter gains an advance. Roll on a 2d6 table favouring characteristic bonuses. A new recruit (Juve) becomes a trooper (Ganger) after gaining 20 experience points Necromunda
Recruitment 100 credits per game + 100 bonus for sacrificing a promethium tank (see below). Credits must be spent on equipment or recruitment. Any credits not spent are lost. Equipment must be assigned to a specific model and cannot be transferred. Gangs start with d6 territories generating random amounts of credit, adjusted for the size of the gang. This goes in a gang stash which can be freely spent on equipment and recruitment. Credits not spent remain in the stash Shadow War
Special Operatives Sacrifice a Promethium Tank to recruit an operative for one game. Operatives cost a set amount to hire and must be paid a fee each game to remain with the gang. Shadow War (with modifications)
Winning the Campaign After each game, the winning side gains D3 promethium tanks and the loser 1. To win, collect 15 tanks and win one more game. No set conditions, though Gang Rating (Total Credits + Total Experience) can be used to track gang progress Shadow War, but use Gang (Kill Team) rating to determine bonus experience.

The subplots table is a basic random table you roll on at the start of the game to add some extra interest. It isn't found in Necromunda but I saw no reason to leave it out of my campaign.

The injuries table was a bit of a no-brainer. You roll on it for each model taken out of action during the game to see what happens to them. The Shadow War one is a d6 table, with only 5 different results, while the Necromunda one uses a d66 for 36 different results. Games Workshop was a bit enamoured of d66 tables in the mid-late 1900s. These work by having you roll 2 6 sided dice counting one as tens and the other as units, giving a value of between 11 and 66, but with certain values missing (you can't get anything ending in 7-9 or 0). As the Necromunda table had more and more interesting results, I decided to use that, so far so good.

The experience rules presented a bit more of a dilemma. The Necromunda rules require a lot more book keeping, as you have to track what your fighters do during the missions and assign experience points accordingly. They can also be a bit unbalancing as a a kill-team that does well early on can get a big advantage. On the other hand, there is gang rating system that scores you gang based on a combination of points cost and experience, with the "underdog" getting bonus experience which can help to level it out. It also relates your fighters development to their actual behaviour in-game, so I decided to risk the balance issues and use the Necromunda version. Translating the experience scores from the Necromunda missions is pretty easy as all the Shadow War missions are copied, pretty-much straight, from the Necromunda book.

For the recruitment rules, I decided to stick with  Shadow War. Necromunda uses a system of randomly generated territories which generate a variable income. Like the experience rules these can be unbalancing, as gangs ongoing income is dependent on a random roll at the start of the campaign. Unlike the experience system, there isn't anything to offset this. The bigger problem for me though, was making the rules make sense in the context of my campaign. The rules describe gangs scavenging for scrap metal or dangerous chemicals, which might work for Orks or Dark Eldar, but is a bit odd for Space Marines or Sisters of Battle, who probably don't get supplies on the black market. I didn't think the effort required to re-write them for my campaign would be worth it.

I also decided to use the Shadow War Special Operative rules. These allow you to recruit more powerful or unusual fighters for one off games. Necromunda has similar rules, but its rules gives each operative a specific cost and allows you to keep them around between games if you keep paying it. As the Shadow War operatives all have the same cost, this doesn't really translate.

The Shadow War victory conditions were definitely staying, largely because Necromunda doesn't have any and I wanted my campaign to have a definite end point. Though I may reduce the number of Promethium Tanks required to win, depending on how long the campaign goes on and whether or not I get bored.

I did decide to introduce a house rule. In Shadow War, recruiting a special operative costs you a promethium tank. Given you need the tanks to win the campaign I didn't think I would ever use them. It wouldn't be worth the risk giving the winning side only gets d3 tanks, meaning that even if your operative is the difference between victory and defeat, you only had a 2/3 chance of coming out ahead. But, I do have some nice Special Operative models I would quite like to use, so I decided they could also be recruited by sacrificing the credits you get for recruitment between games. So, under my rules you can either recruit 100 credits of new models, buy 100 credits of equipment or recruit a special operative for the next game.

With the rules established, I wanted my campaign to have a bit of back story. I have six different Kill Teams planned and I wanted some excuse for them to be wandering around in the same place at the same time. I didn't want to get too elaborate, so I worked out the little story that follows.

Inquisitor Rudolphus was a controversial figure, skirting the line between reactionary and radical and never being entirely friendly to other side. He was, however, a greater collector and hoarder of artifacts, whether Imperial, Chaotic or Xenos. On his death, his archive was much sought after but never discovered.

Recently, a signal beacon started transmitting from the Hive World of Chet. The Seismic activity under the abandoned Prag Hive had allowed the beacon's signal to penetrate the atmosphere. This signal was identified as coming from Inquisitor Rudolphus lost archive. This contents of this archive are of great interest to dozens of factions and teams immediately set out to search for it.

For the purpose of my campaign "promethium caches" will be replace with "data caches" which provide my teams with information leading them to the archive. The final game will take place in the Archive itself, with the winners taking off with a collection of invaluable relics, treasure and information.

With the admin out of the way, here are a few pictures from my first game. The Sisters of Battle of the Order of the Argent Shroud took on the Death Guard Plague Marines. I didn't take many pictures as this was quite an impromptu game, as I was relearning the rules, and include (heresy) unpainted scenery.


The game started with a fire fight between the Plague Marine and Sister Specialists across the centre, while Sister Superior Winnifred lead a small group in an attack on the Plague Marine's left flank. Sister Winnifred took out Brother Scrofula with her Power Sword, only for her group to come under heavy fire. They weathered it well, with only one Sister going down and she recovered with a flesh wound.


The Plague Marine Champion, Brother Corpulous ran moved to fire on Sister Superior Winnifred, but missed and exposed his back to Sister Theodora who gunned him down with her Storm Bolter. With two out of five Plague Marines out of action and the Sisters stubbornly refusing to go down, the Plague Marines only lasted a couple more turns before bottling.


The Sisters did very well out of the game, securing 4 data caches, having rolled a three and getting a bonus one for having taken more than three times as many enemies out as they lost themselves. It wasn't all bad for the Plague Marines, however, thanks to the underdog bonus they all gained plenty of experience points and Brother Buboes gained the exceptionally useful "Scavenger" skill, giving them an extra 50 credits for recruitment, which allowed them to just barely afford an extra marine.

The Sisters also did well out of experience, also getting the Scavenger skill and recruiting another Sister. All of which means more painting before their next mission. Though, before that happens, I have four more gangs to paint.

Sunday 23 July 2017

New Project: Shadow War

When Games Workshop first announced Shadow War: Armageddon I didn't pay much attention. It seemed like a way to flog their new industrial scenery by throwing together a game using the old Necromunda* rules and some Space Marine Scout and Ork models. Basically a smart use of existing assets, but not of great interest to me as a I already owned Necromunda first edition.


Games Workshop also didn't seem to expect much from it as they made it limited edition and let it sell out in about five minutes. They clearly underestimated the interest in their old games as this lead to a huge fuss online. To their credit, and uncharacteristically, GW responded to the complaints and released a paperback version of the rulebook on its own. In addition to the rules from the game, this also included the rules for additional Kill-Teams based on other armies that they had published online and a couple of new ones.

It was at this point I started to take an interest as I realised that I could put together about six gangs without having to buy a single model and, in one case, without even having to paint a single model. And, even better, I would be able to use some lovely old models that had been sitting around neglected.

Having finished my Beyond the Gates of Antares project and finished my Dwarf buildings, now seems like a good time for a Shadow War project. It's a bit of contrast to my last two projects, in that its based on small teams of models, which means lots of variety and that I can afford to take a bit more time over the individual models.

It's also likely to go slightly differently than my last two projects. For Warhammer Siege and BTGOA I basically painted enough models to play a game, played it, painted some more and so on. I'll probably start that way with Shadow War. I'll paint two Kill-Teams, play a game, paint two more and so on. But once I have six teams painted, I'll be more or less done with painting, barring a few new recruits that I might add to the Kill Teams as the campaign progresses.

On the other hand, the campaign is likely to last longer than three games, quite a bit longer. To actually win a campaign in Shadow War, a Kill-Team is supposed to collect 15 Promethium caches and then win one more game. The rules give the winner of each game D3 caches and the loser 1, play some scenarios give you the opportunity to win one more. This means that to win a campaign, a Kill-Team needs to play a minimum of 5 games (4 to collect the caches, if they are very lucky, plus one more win). And I have six Kill-Teams. Depending on how things go, I may reduce the number required to win, but I'm still likely to be playing games long after my models are all painted.

But, this gives me an opportunity. With the campaign still going on, I can turn my attention to a new painting project, probably an army-sized one that would require me to paint a lot of models before I can do any gaming. I haven't decided what that will be yet, but I have plenty of options.

In the meantime, here are my first two Kill Teams. The first are Sisters of Battle from the Order of the Argent Shroud. I've had Sisters of Battle sitting around for years unpainted and recently picked up some more because I thought (completely wrongly) that Games Workshop might be about to retire them. I painted them in the Argent Shroud colours because I knew I could do a decent and quick job using Army Painter plate metal spray as a base, having used the same trick for my Concord and Chaos Dwarfs


My second Kill-Team is the one I didn't have to paint. I've had my Death Guard Chaos Marines for years and haven't used them since Warhammer 40,000 4th edition, so this was a good chance to get them out and give them another chance. I painted them in double quick time for a campaign, mostly by dry-brushing grey over brown which gave them a slightly dusty look which I think works okay for Nurgle Marines. I think the painting stands up okay, though the champion's face looks a bit basic and I may at least try painting his eyes. My biggest regret is my choice of yellow-brown as a contrasting colour makes them look a bit purple even though they were only painted in grey.


More soon as the campaign gets under way.

*According to one reviewer who owns a copy of the second edition Necromunda rule book, it actually replicates them perfectly, right down to the layout as though they just did a bulk find and replace on the word "gang" and "gangers" and swapped out the design template.

Wednesday 21 June 2017

That's my beer!

Following my previous post on my lovely new Dwarf Brewery model, here are some pictures of it in action. I played a smallish, 2,000 point Warhammer game in which the Chaos Warriors of Azazel, Daemon Prince of Slaanesh, attempted to invade the Dwarf Brewery and steal all their beer. After all, who else would want to steel good Dwarf Beer but a Daemon Prince dedicated to the God of pleasure?

The Brewery building had two functioning floors and a roof. I decide the ground floor could be accessed from three side, and the second floor and roof from the side with the stairs. If the Chaos forces could drive the Dwarf defenders out or contest one of the floors, they would get a bonus 500 victory points. I set this condition quite low as the Dwarfs started out in control of the building.

The Brewery stood defiant, assisted by a cannon on the roof.
Dwarf Slayers wiped out the Forsaken in combat. At least the Forsaken got to do something this time though, instead of being wiped out by Organ Gun fire.
The Chaos Giant was shot dead by mass Dwarf crossbow and handgun fire. They were taking no chances after the last battle.
The Hammerers sold their lives dearly in defence of their beer.
Marauders assault the Longbeards on the ground floor, but were driven back. The Musician rallied the unit from his position on the bar. The Standard was too tall to fit in the ground floor and so took up position on the roof.
The Organ Gun was lethally effective, wiping out the Chaos Warriors and the fleeing Marauders.

In the end, the Dwarfs were able to hold the brewery. The Daemon Prince and Doom Knight finished off the Hammerers and the Cannon on the roof, but were too big to enter the building and too far away from the other three sides to assault the Longbeards.

A quick, messy and fun game that gave the new buildings a good workout. Having some proper dwarf scenery really added something. IT was also a good to give Azazel a workout. The model has been lying around for years since I picked him up cheap in some Games Workshop sale or other. I painted him up quickly for the game and he proved pretty deadly in combat.

That's one mini-project out of the way and so it's on to the next. More on that soon.