Bear with me, this one is going to be a bit of a ramble.
The other day I was thinking about Games Workshop's new Archaon model (it takes me 15 minutes to walk from the station to work, my mind tends to wander). I was thinking about how effective he might actually be on the table. My, so far limited, experience of Age of Sigmar is that individual models are not as effective as you might think because they can overwhelmed by units that can roll a lot more dice.
I then thought, but could a unit of Stormcast Eternals roll enough dice to finish off Archaon before he annihilated them? But then I thought, Archaon costs £100, you can get nearly three boxes of Stormcast for that.
And then the revelation hit me. If you want a points system for Age of Sigmar, why not just use pounds? It's good enough for most game shows.
I am not being even slightly flippant or facetious. I genuinely think this could work. Though this wasn't always the case. Back in Warhammer 4th and 5th edition, the proliferation of special characters meant that for about £5 you could pick up a single model that could destroy a unit single-handedly. Then as Games Workshop increasingly used a mix of metal and plastic, cheap plastic units could be far more effective than bulky metal special units. But as the company has shifted to producing pretty much everything in plastic, they have also shifted to producing larger models in plastic and developing rules to justify the price of the model. This became most apparent during the end times when the super sized characters, Nagash, the Glottkin, the Verminlord and the Bloodthirster all cost multiple hundreds of points to justify their cash you had to shell out to get them. The development of the new Archaon model seems to have been driven by this trend. Only a model of this size could justify the plethora of special rules required for the Lord High Grand Poobah of Chaos (or whatever they're calling him these days).
Put simply, expensive models tend to be worth more on the battlefield.
Of course there would have to be some adjustments. The prices used would have to be based on the current Games Workshop prices, not discounts from third party retailers. And, if you wanted to use old models, you would have to base the cost on the versions currently available from Games Workshop. My 20 old Dwarf Longbeards cost me £25 when I bought them, but to replace them with the new versions would cost £60, and so that's their Age of Sigmar cost.
Possibly the most difficult models would be the ones in the starter box, which is generally considered to be excellent value for money. Fortunately, the bulk of the models included can now be obtained separately and the rest can probably be calculated based on their size. You would also have to do some adjustments if you wanted to use any models from Forge World.
I'll admit its a bit crude and not entirely balanced, but then what points system is? Certainly not Warhammer 8th edition (and probably not Warhammer 40,000 7th edition). But I'm guessing this would work at least as well as a system based around wounds.
So who's for a £500 game?
Wednesday, 16 December 2015
Wednesday, 9 December 2015
Warhammer Siege - Chaos Turn 1 - Undermine
The black armoured form of the Chaos Lord Sundar Klash stalked towards the chaos camp. A burial detail had been organised, while Chaos Dwarfs reorganised their scattered supplies and damaged war machines. The Chaos Champion Chakram Manflayer and the Daemonsmith Zanbad Curseheart were in heated discussion.
"I will destroy those accursed sun-lickers," the diminutive Sorcerer yelled. "I will make a pire for there hearts and grind the bones to powder. They dared to touch my war machines and injured my kinsman. They will suffer for this outrage."
"I lost men in defence of those warmachines," Manflayer said. His voice was soft, but menacing. "You are not the only one who is owed a debt."
" Your men are trivial compared to my machines," Zanbad said. "Without my machines you have no hope of breaching the sun-lickers walls."
Manflayer was about to retort, when the Chaos Lord stepped between them.
"If you are so keen to take revenge" the Chaos Lord said to Zanbad , "then I am sure you will have no objection in leading the first assault."
Zanbad was silent for a moment. The Chaos Lord had him. He could not refuse without losing face. But he had no desire to sacrifice any of his own people in a doomed frontal assault. He smiled evily as inspiration struck.
"Agreed," he said, "but we will not lead a conventional assault. I have something more devious in mind."
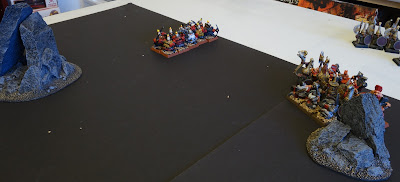
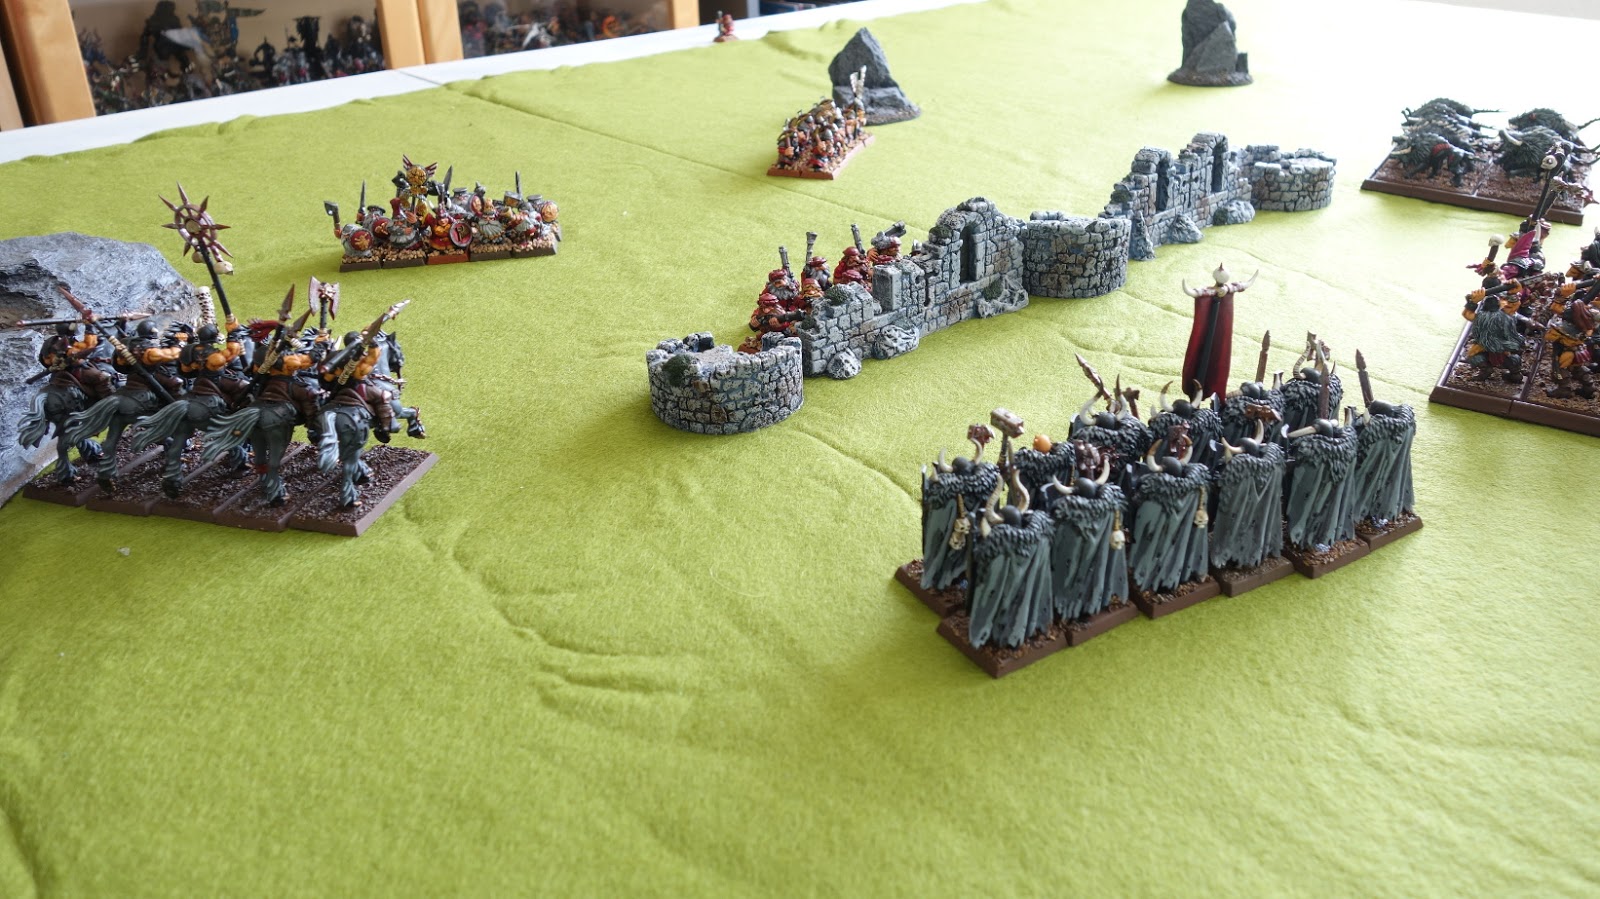
For the Chaos army's first turn, they chose the scenario undermine. A small force of miners would attempt to hold out in the dark tunnels below the castle walls. If, at the end of four turns, they had more points left than their opponent, the castle walls would be seriously damaged.
For this scenario, I decided the besieging force should be made up entirely of Chaos Dwarves as the Chaos army would obviously employ them to do the undermining.
It was a very odd scenario; no missile troops, magic or even standard bearers; played on a 3' by 3' board; movement is determined by troops ability to see in the dark, which means the dwarfs movement actually increases; if anyone flees they are automatically caught; and, weirdest of all, no formal charges, units can just move into one another and will count as charging if they do. Given that the last rule was clearly written in a time before pre-measuring, I decided that I wouldn't allow it for this scenario. Given that it represents close quarter fighting in dark tunnels, I thought this added an appropriate note of tension.
Forces were as follows:
Chaos Dwarfs Besiegers
Infernal Castellan - Razak Firefist
2 Units of 12 Infernal Guard
Dwarfs Besieged
Thane Undred with great weapon
10 Longbeards
10 Slayers, including a giant slayer
10 Miners

 With no missile weapons in play, there was little for the dwarfs to do but advance as quickly as possible.

In contrast, the Chaos Dwarfs held position. They had been deployed to minimise the possibility of flank charges, and they weren't about to break formation.

Meanwhile, the Slayers faced the other unit of Chaos Dwarfs. The Giant Slayer issued a challenge to the Chaos Dwarf Champion, which was accepted only for the Giant Slayer to fumble his attacks and be cut down for his trouble. However, after some terrible rolling, the Chaos Dwarfs only managed to kill 1 Slayer to the Slayers 3. The Chaos Dwarfs should have passed their break test with ease, but rolled an 11, and were hacked to pieces in the dark.

Things were looking very bad for the Chaos Dwarfs. Their only serious chance was to break the Longbeards, giving them an even chance against the Slayers. Castellan Razak Firefist stepped up to the mark, challenging Thane Undred and cutting him down. The Chaos Dwarfs killed two more Longbeards, but the dwarfs gave as good as they got, killing 3 Chaos Dwarfs for a draw.

Clearly lost in the dark, the Miners still didn't arrive. But it was little comfort to the Chaos Dwarfs who were attacked from the rear by the Slayers. Razak Firefist issued a challenge, which the Longbeard Veteran, hoping to avenge Thane Undred, was only too happy to accept, but neither was able to get passed the others defence.

The Slayers killed two and the Longbeards one, with 2 Longbears falling in exchange. The Chaos Dwarfs lost the combat, but passed their break test.

With no-one left to challenge, Castellan Razak killed 1 Longbeard. The Slayers struggled to get through their opponents black shard armour (they made two saving throws of 6) and were only able to fell a single Chaos Dwarf. But, one lucky slayer found his way passed the Castellan's guard and took his final wound. The Chaos Dwarfs killed 1 Longbeard in exchange for a 2 - 2 draw.

The last turn, and the Chaos Dwarfs had little choice but to sell their lives dearly. They resisted all the dwarfs attacks and felled the last Longbeard, but as the Slayers were unbreakable, this was all they could do.

The Dwarfs won the encounter with 228 points left to the Chaos Dwarfs 40.
The outcome was pretty much decided when the first Chaos Dwarf unit broke. The remaining unit didn't have the numbers to win a war of attrition and spent the rest of the game being slowly whittled down.
In retrospect, it would probably have been more interesting to break the armies down into smaller units. The Chaos Dwarfs could have operated in units of 6, without being especially vulnerable. Based on the 8th edition army lists, this would have been against the rules, but, given the scenario was written for 5th edition, I could have ignored that.
With the attempt to undermine defeated, Chaos gained no additional advantage and it was time to roll to see if the siege would continue. I had to roll a d6 and add the number of siege turns played, if I rolled a 7 or more, it would be time for the final assault. I rolled low and the siege continues.
"I will destroy those accursed sun-lickers," the diminutive Sorcerer yelled. "I will make a pire for there hearts and grind the bones to powder. They dared to touch my war machines and injured my kinsman. They will suffer for this outrage."
"I lost men in defence of those warmachines," Manflayer said. His voice was soft, but menacing. "You are not the only one who is owed a debt."
" Your men are trivial compared to my machines," Zanbad said. "Without my machines you have no hope of breaching the sun-lickers walls."
Manflayer was about to retort, when the Chaos Lord stepped between them.
"If you are so keen to take revenge" the Chaos Lord said to Zanbad , "then I am sure you will have no objection in leading the first assault."
Zanbad was silent for a moment. The Chaos Lord had him. He could not refuse without losing face. But he had no desire to sacrifice any of his own people in a doomed frontal assault. He smiled evily as inspiration struck.
"Agreed," he said, "but we will not lead a conventional assault. I have something more devious in mind."
For the Chaos army's first turn, they chose the scenario undermine. A small force of miners would attempt to hold out in the dark tunnels below the castle walls. If, at the end of four turns, they had more points left than their opponent, the castle walls would be seriously damaged.
For this scenario, I decided the besieging force should be made up entirely of Chaos Dwarves as the Chaos army would obviously employ them to do the undermining.
It was a very odd scenario; no missile troops, magic or even standard bearers; played on a 3' by 3' board; movement is determined by troops ability to see in the dark, which means the dwarfs movement actually increases; if anyone flees they are automatically caught; and, weirdest of all, no formal charges, units can just move into one another and will count as charging if they do. Given that the last rule was clearly written in a time before pre-measuring, I decided that I wouldn't allow it for this scenario. Given that it represents close quarter fighting in dark tunnels, I thought this added an appropriate note of tension.
Forces were as follows:
Chaos Dwarfs Besiegers
Infernal Castellan - Razak Firefist
2 Units of 12 Infernal Guard
Dwarfs Besieged
Thane Undred with great weapon
10 Longbeards
10 Slayers, including a giant slayer
10 Miners

Deployment.
The Miners deployed in ambush. If you're wondering why there are only 10 Chaos Dwarfs in each unit, it's because I forgot how many there were supposed to be and had to add them in after.
Dwarf Turn 1

Chaos Dwarf Turn 1

In contrast, the Chaos Dwarfs held position. They had been deployed to minimise the possibility of flank charges, and they weren't about to break formation.
Dwarf Turn 2
The miners failed to show up and so the rest of the dwarf force engaged without them, both units moving into combat. The Longbeards faced the Infernal Guard lead by the Infernal Castellan Razak Firefirst and Thane Undred issued a challenge, which was accepted. The two traded blows each causing one wound. The Longbeards killed 3 Chaos Dwarfs and the Chaos Dwarfs 4, giving the Chaos Dwarfs a narrow victory, but the Longbeards passed their break test with ease.

The Infernal Castellan and Thane trade blows
Meanwhile, the Slayers faced the other unit of Chaos Dwarfs. The Giant Slayer issued a challenge to the Chaos Dwarf Champion, which was accepted only for the Giant Slayer to fumble his attacks and be cut down for his trouble. However, after some terrible rolling, the Chaos Dwarfs only managed to kill 1 Slayer to the Slayers 3. The Chaos Dwarfs should have passed their break test with ease, but rolled an 11, and were hacked to pieces in the dark.

Almost half the Chaos Dwarf force is cut down by the Slayers
Chaos Dwarf Turn 2

Both sides fight fiercely
Dwarf Turn 3

The Slayers killed two and the Longbeards one, with 2 Longbears falling in exchange. The Chaos Dwarfs lost the combat, but passed their break test.
Chaos Dwarf Turn 3
The desperate struggle continued and, again, the Castellan issued a challenge, this time slaying his opponent. The Longbeards and Slayers, clearly shaken failed to kill a single Chaos Dwarf, but the Chaos Dwarfs did no better. The Dwarfs lost the combat by one point, but the Longbeards passed their break test.

Dwarf Turn 4
The miners finally arrived, too late to do any good. They advanced anyway, if only to show willing.

With no-one left to challenge, Castellan Razak killed 1 Longbeard. The Slayers struggled to get through their opponents black shard armour (they made two saving throws of 6) and were only able to fell a single Chaos Dwarf. But, one lucky slayer found his way passed the Castellan's guard and took his final wound. The Chaos Dwarfs killed 1 Longbeard in exchange for a 2 - 2 draw.
Chaos Dwarf Turn 4

The last turn, and the Chaos Dwarfs had little choice but to sell their lives dearly. They resisted all the dwarfs attacks and felled the last Longbeard, but as the Slayers were unbreakable, this was all they could do.

The Dwarfs won the encounter with 228 points left to the Chaos Dwarfs 40.
The outcome was pretty much decided when the first Chaos Dwarf unit broke. The remaining unit didn't have the numbers to win a war of attrition and spent the rest of the game being slowly whittled down.
In retrospect, it would probably have been more interesting to break the armies down into smaller units. The Chaos Dwarfs could have operated in units of 6, without being especially vulnerable. Based on the 8th edition army lists, this would have been against the rules, but, given the scenario was written for 5th edition, I could have ignored that.
With the attempt to undermine defeated, Chaos gained no additional advantage and it was time to roll to see if the siege would continue. I had to roll a d6 and add the number of siege turns played, if I rolled a 7 or more, it would be time for the final assault. I rolled low and the siege continues.
Tuesday, 10 November 2015
Warhammer Siege - Dwarf Turn 1 - Sally Out
Lord Durak Irongrim looked out over the battlements of Karaz Kor. In the distance, the dark shapes of Chaos worshippers could be seen pitching camp.
"You did well to delay them lass," he said, turning to his daughter. "It'll take them time to be ready, and we're well supplied and dug in."
"Yes father," Zoe said, grimly, "but a lot of brave warriors died to hold them back. I'll make them pay for every life they took."
"Patience my Princess," Lord Durak said. "They haven't a hope of breaching these walls with their foul Chaos weapons."
"Dawi-Zharr," the keen-eyed Borri suddenly called out. "They have brought Dawi-Zharr."
Lord Durak pulled out his telescope and gazed into the distance. He could just make out the shape of a Chaos Dwarf overseer barking orders to two assistants assembling a rocket on a carriage. This was dark news, the weapons of the Chaos Dwarfs might be able to breach the walls.
"We have to strike now, before they're ready," Thane Zoe said. "I'll the attack."
Lord Durak nodded grimly, he didn't want to risk his daughter, but the situation was desperate.
"In that case, take your mother's axe," he said. "It's strike faster and truer than any other weapon. And may Grimnir go with you."
One of the nice features of the Chaos Dwarf rules in the Tamurkhan book was the inclusion of rules that allowed you to add Chaos Dwarf units to your Chaos Warrior army. When I decided to play a siege campaign I knew I had to include a few Chaos Dwarfs, and this was my first opportunity.
The scenario - Sally Out (number 7 in Warhammer Siege) would be a tough one for the dwarfs. Their objective was to make their way across the table and get into contact with an objective marker representing the Chaos army's ammunition and supplies. Each turn they stayed in contact they could roll a dice and on 4+ it was destroyed. With only five turns, it was going to be tight, but if they succeeded, the Chaos army would have to pay double points for all their war machines in the final assault.
The dwarfs had one trick up their sleeves in them form of a unit of miners. I decided to add an extra rule that the miners could not enter the table within 12" of the objective as that would make things a little easy. Miners didn't have the ambush rule in 5th edition, so this wouldn't have been thought of at the time.
I also made a slight change to deployment. The fortress was supposed to be deployed 12" forward and the dwarfs inside, but rather than mess around moving through the gate I moved the fortress back and allowed the dwarfs to deploy 12" forward instead.
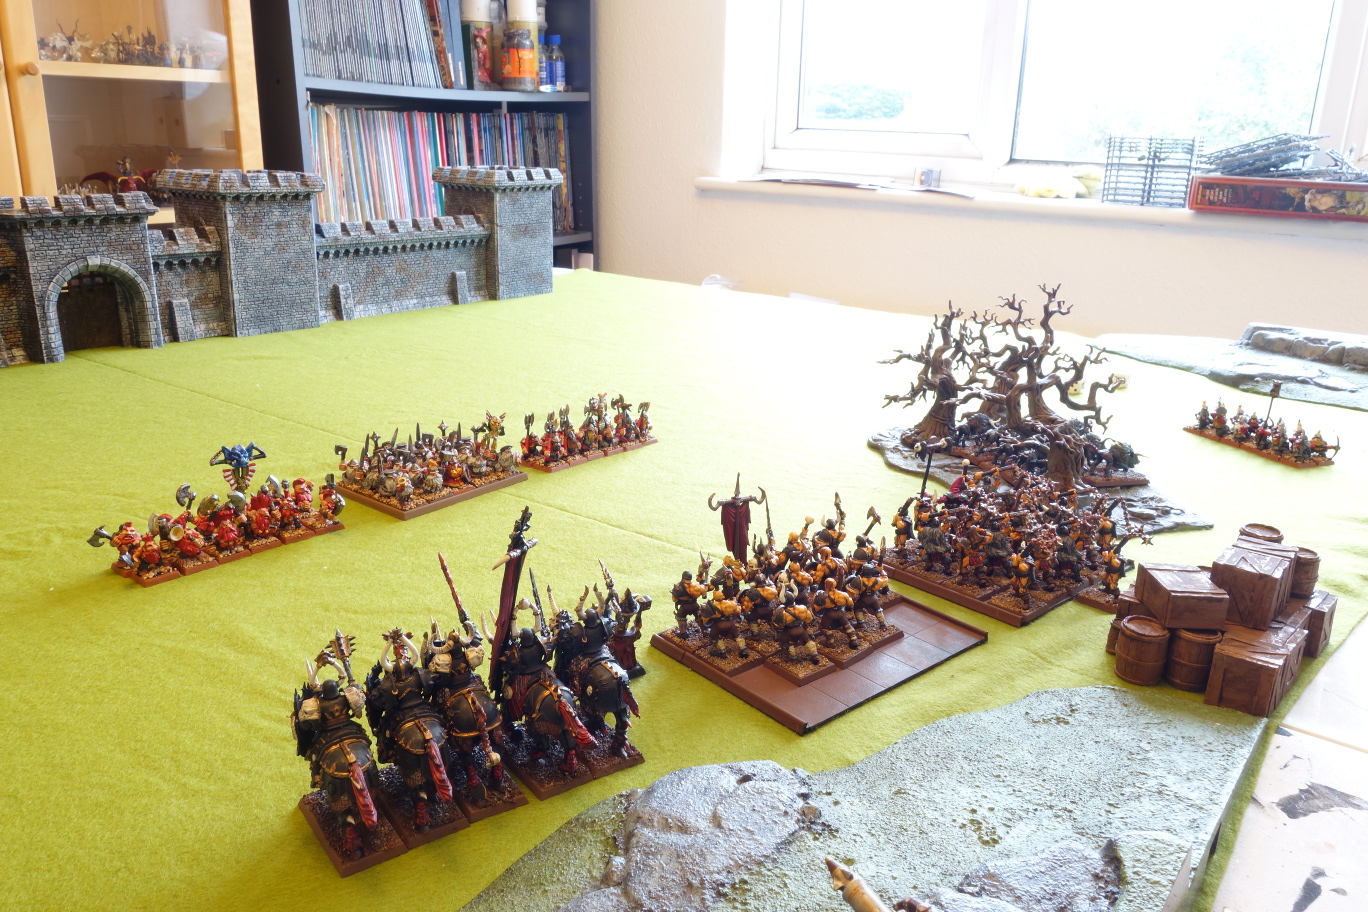
The army line up was as follows:
Dwarfs
Thane Zoe (with the ability to re-roll her combat dice once per battle and now equipped with the Master Rune of Swiftness and a Rune of Stone).
20 Longbeards
12 Warriors with great weapons
12 Slayers
12 Miners (ambushing)
1 cannon (deployed on the battlements as per the scenario rules)
Chaos
Chakram Manflayer (with Iron Hard skin from the last game)
Chaos Dwarf Daemonsmith (with the spell Searing Doom from the Lore of Metal)
20 Chaos Marauders with Flails and the Mark of Slaanesh
20 Chaos Marauders with Hand Weapons and Shields
10 Chaos Hounds
5 Chaos Knights
1 Chaos Dwarf Shrieker Rocket

Apologies for the odd lighting quality of some of the pictures below. I was trying use natural light as much as possible, but it got too poor at the end of the battle and I had to switch the light on. I thought I had the right setting on my camera to compensate, but, evidently, it turned itself off after the first shot and so the rest look a bit orange.
The Besieged Dwarfs automatically took the first turn.
The dwarfs advanced as rapidly as their stumpy legs would carry them, under cover fire from the cannon, which managed to kill 2 Marauders.

The Chaos line held position, defending the supplies. Only the Daemonsmith moved forward into spell range. Despite successfully casting the spell, it was easily dispelled by the dwarfs natural magic resistance. The Shrieker rocket targeted the cannon with a demolition shell, but scattered and failed to hit the target.


The miners arrived right on schedule, tunnelling their way to the back of the Chaos line, as close to the supplies as they could get. They manoeuvred quickly towards the Chaos Hounds in the wood. 4 more Marauders were blown to pieces by cannon fire, but this was still one too few to force a panic test.


The Hounds changed position to face the Miners, making sure that if they got charged, it wouldn't be in the rear. Otherwise, the Chaos line held position again. Having rolled a 5 and a 1 for the Winds of Magic, the Daemonsmith risked all the dice on casting Searing Doom on the Longbeards, but again the Dwarfs dispelled it. The Shrieker rocket overshot the Longbeards, catching one of them, but failing to wound.
The Miners attempted to charge the Chaos Hounds, but rolled low and failed to contact. Cannon fire killed 1 Marauder and the rest of the Dwarfs advanced again, making sure they were lined up so that if any of the Chaos units failed a charge, they would be in a good position to counter charge in turn 4.

The dwarfs were close enough for a charge, but the line up was not looking favourable. With that in mind, the Chaos Knights crossed the line to charge the Longbeards, while Chakram Manflayer lead his Marauders against the Warriors. The remaining Marauders elected not to charge, instead moving to protect the Knights left flank from the Slayers. On the Chaos right flank, the Chaos Hounds charged the Miners.

Having rolled a double 6 for the Winds of Magic, the Daemonsmith decided to go for broke and cast Searing Doom on maximum power with 8 dice. Unsurprisingly, he miscast, but the resulting spell caused 10 hits on the Longbeards and killed 7. Unfortunately for the Daemonsmith, the resulting backlash cost him his level and his only spell.
The Shrieker Rocket finally fired on target, hitting the Slayers and killing five.

The Miners and the Hounds traded blows, killing one each. The Miners won the combat by 1 and the Hounds fled, though the Dwarfs failed to catch them.

Chakram Manflayer challenged the Dwarf Veteran and, unsurprisingly, killed him gaining Unearthly reflexes (+1 initiative) for his trouble. 4 more dwarfs were killed, but they retaliated by killing 5 Marauders. Ranks and the charging bonus made the difference and the dwarfs fled, though Manflayer had his Marauders hold position. The Dwarfs had no chance of reaching the supplies now.
The Doom Knight challenged Thane Zoe, but her Master Rune of Swiftness proved to be a worthwhile investment. She struck first, hit and wounded twice and, despite a save of 3+, the Doom Knight failed one save and was killed. One Knight and one Longbeard were killed and the Dwarfs won 4 - 3. Remarkably, the Chaos Knights failed the break test on a double 6. Even more remarkably, the Longbeards pursued and caught up with them, catching the Marauders in the flank.

Not letting the Longbeards hog all the glory, the Slayers charged the Marauders from the front. Meanwhile, the Warriors rallied and the Miners continued their advance on the supplies.

With their previous target engaged in combat, the Cannon target Chakram Manflayer's Marauders, killing three, though, thanks to the Mark of Slaanesh, they were immune to panic.

The Marauder Chieftain was compelled to issue a challenge and was, unsurprisingly, cut to pieces by the Giant Slayer. Inspired by his example, the dwarfs killed 10 Marauders between them, suffering no casualties in return. In the face of a 15 - 1 victory, the Marauders broke. The Slayers pursued but the Longbeards, clearly still fired up, failed their restrained test and took of as well. The Slayers out paced them however and slammed straight into the Daemonsmith.

Despite being in site of their general, the Chaos Hounds failed to rally and ran through the Marauders, who, again, benefited from their immunity to panic. They may have been slightly disconcerted, however, as they failed their leadership test for rapid reform and were only able to turn around.
The Shrieker rocket targeted the Miners. The rocket went off target, but then returned, killing three miners, though they passed their panic test.

The Daemonsmith decided not to buck the trend and challenged the Giant Slayer. The two attacked simultaneously and killed each other.

This almost the Dwarf's last chance for victory. The Miners charged the objective and made it. The Warriors attempted a long charge against the Marauders in the hope of slowing them down, but failed to make it. Thanks to rolling a 10 on the misfire dice, the Cannon overshot the Marauders and failed to kill any of them.

The Miners needed to roll a 4 of more to destroy the objective. They rolled a 3. No victory yet.
The rule book was a little ambiguous about when the besieged rolled to see if they destroyed the objective. It just said for every combat round they stayed in contact with it. I decided that meant friendly or enemy combat rounds, but the Miners would have to stay in contact for the whole round. So if Chaos could destroy them, they would win.

The Marauders charged the Miners. The Chaos Hounds failed to rally, but no-one cared about them by this point. Chakram Manflayer challenged the Miner's Prospector and cut him down. He was rewarded with even more unearthly reflexes, for a total bonus of +2. Chakram and the Marauders won the combat 9 - 3 and the Miners broke, denying them a final chance to destroy the supplies.

The Chaos army was victorious.

If the last battle looked like it was going one way before suddenly going completely the other way, this battle was up in the air until the very last turn.
It was always going to be a tough one for the Dwarfs, but they performed admirably, the Miners doing exactly what was expected of them. But they benefited from some very lucky (or unlucky depending on who was doing it) rolling. The Knights breaking and then being run down was something they could never have relied on.
The Master Rune of Swiftness was well worth its weight in points for Thane Zoe, who once again performed admirably, gaining a battle honour in the process. Chakram Manflayer continues on his path to glory although these two enemies have yet to face one another in a challenge. It can only be a matter of time.
It was striking how many panic tests were avoided by units being immune to panic. The Longbeards, Slayers and Chakram's Marauders all avoided panic tests thanks to immunity. Without it, surely at least one test would have been failed and that would have made all the difference to the final outcome.
With the Dwarf's first siege turn complete, it's time for Chaos to plan its next move.
"You did well to delay them lass," he said, turning to his daughter. "It'll take them time to be ready, and we're well supplied and dug in."
"Yes father," Zoe said, grimly, "but a lot of brave warriors died to hold them back. I'll make them pay for every life they took."
"Patience my Princess," Lord Durak said. "They haven't a hope of breaching these walls with their foul Chaos weapons."
"Dawi-Zharr," the keen-eyed Borri suddenly called out. "They have brought Dawi-Zharr."
Lord Durak pulled out his telescope and gazed into the distance. He could just make out the shape of a Chaos Dwarf overseer barking orders to two assistants assembling a rocket on a carriage. This was dark news, the weapons of the Chaos Dwarfs might be able to breach the walls.
"We have to strike now, before they're ready," Thane Zoe said. "I'll the attack."
Lord Durak nodded grimly, he didn't want to risk his daughter, but the situation was desperate.
"In that case, take your mother's axe," he said. "It's strike faster and truer than any other weapon. And may Grimnir go with you."
One of the nice features of the Chaos Dwarf rules in the Tamurkhan book was the inclusion of rules that allowed you to add Chaos Dwarf units to your Chaos Warrior army. When I decided to play a siege campaign I knew I had to include a few Chaos Dwarfs, and this was my first opportunity.
The scenario - Sally Out (number 7 in Warhammer Siege) would be a tough one for the dwarfs. Their objective was to make their way across the table and get into contact with an objective marker representing the Chaos army's ammunition and supplies. Each turn they stayed in contact they could roll a dice and on 4+ it was destroyed. With only five turns, it was going to be tight, but if they succeeded, the Chaos army would have to pay double points for all their war machines in the final assault.
The dwarfs had one trick up their sleeves in them form of a unit of miners. I decided to add an extra rule that the miners could not enter the table within 12" of the objective as that would make things a little easy. Miners didn't have the ambush rule in 5th edition, so this wouldn't have been thought of at the time.
I also made a slight change to deployment. The fortress was supposed to be deployed 12" forward and the dwarfs inside, but rather than mess around moving through the gate I moved the fortress back and allowed the dwarfs to deploy 12" forward instead.
The army line up was as follows:
Dwarfs
Thane Zoe (with the ability to re-roll her combat dice once per battle and now equipped with the Master Rune of Swiftness and a Rune of Stone).
20 Longbeards
12 Warriors with great weapons
12 Slayers
12 Miners (ambushing)
1 cannon (deployed on the battlements as per the scenario rules)
Chaos
Chakram Manflayer (with Iron Hard skin from the last game)
Chaos Dwarf Daemonsmith (with the spell Searing Doom from the Lore of Metal)
20 Chaos Marauders with Flails and the Mark of Slaanesh
20 Chaos Marauders with Hand Weapons and Shields
10 Chaos Hounds
5 Chaos Knights
1 Chaos Dwarf Shrieker Rocket

Deployment
Apologies for the odd lighting quality of some of the pictures below. I was trying use natural light as much as possible, but it got too poor at the end of the battle and I had to switch the light on. I thought I had the right setting on my camera to compensate, but, evidently, it turned itself off after the first shot and so the rest look a bit orange.
The Besieged Dwarfs automatically took the first turn.
Dwarf Turn 1
The dwarfs advanced as rapidly as their stumpy legs would carry them, under cover fire from the cannon, which managed to kill 2 Marauders.

Chaos Turn 1
The Chaos line held position, defending the supplies. Only the Daemonsmith moved forward into spell range. Despite successfully casting the spell, it was easily dispelled by the dwarfs natural magic resistance. The Shrieker rocket targeted the cannon with a demolition shell, but scattered and failed to hit the target.

Dwarf Turn 2

The miners arrived right on schedule, tunnelling their way to the back of the Chaos line, as close to the supplies as they could get. They manoeuvred quickly towards the Chaos Hounds in the wood. 4 more Marauders were blown to pieces by cannon fire, but this was still one too few to force a panic test.

Chaos Turn 2

The Hounds changed position to face the Miners, making sure that if they got charged, it wouldn't be in the rear. Otherwise, the Chaos line held position again. Having rolled a 5 and a 1 for the Winds of Magic, the Daemonsmith risked all the dice on casting Searing Doom on the Longbeards, but again the Dwarfs dispelled it. The Shrieker rocket overshot the Longbeards, catching one of them, but failing to wound.
Dwarf Turn 3
The Miners attempted to charge the Chaos Hounds, but rolled low and failed to contact. Cannon fire killed 1 Marauder and the rest of the Dwarfs advanced again, making sure they were lined up so that if any of the Chaos units failed a charge, they would be in a good position to counter charge in turn 4.
Chaos Turn 3
The dwarfs were close enough for a charge, but the line up was not looking favourable. With that in mind, the Chaos Knights crossed the line to charge the Longbeards, while Chakram Manflayer lead his Marauders against the Warriors. The remaining Marauders elected not to charge, instead moving to protect the Knights left flank from the Slayers. On the Chaos right flank, the Chaos Hounds charged the Miners.

Having rolled a double 6 for the Winds of Magic, the Daemonsmith decided to go for broke and cast Searing Doom on maximum power with 8 dice. Unsurprisingly, he miscast, but the resulting spell caused 10 hits on the Longbeards and killed 7. Unfortunately for the Daemonsmith, the resulting backlash cost him his level and his only spell.
The Shrieker Rocket finally fired on target, hitting the Slayers and killing five.

The Miners and the Hounds traded blows, killing one each. The Miners won the combat by 1 and the Hounds fled, though the Dwarfs failed to catch them.

Chakram Manflayer challenged the Dwarf Veteran and, unsurprisingly, killed him gaining Unearthly reflexes (+1 initiative) for his trouble. 4 more dwarfs were killed, but they retaliated by killing 5 Marauders. Ranks and the charging bonus made the difference and the dwarfs fled, though Manflayer had his Marauders hold position. The Dwarfs had no chance of reaching the supplies now.
The Doom Knight challenged Thane Zoe, but her Master Rune of Swiftness proved to be a worthwhile investment. She struck first, hit and wounded twice and, despite a save of 3+, the Doom Knight failed one save and was killed. One Knight and one Longbeard were killed and the Dwarfs won 4 - 3. Remarkably, the Chaos Knights failed the break test on a double 6. Even more remarkably, the Longbeards pursued and caught up with them, catching the Marauders in the flank.

Dwarf Turn 4
Not letting the Longbeards hog all the glory, the Slayers charged the Marauders from the front. Meanwhile, the Warriors rallied and the Miners continued their advance on the supplies.

With their previous target engaged in combat, the Cannon target Chakram Manflayer's Marauders, killing three, though, thanks to the Mark of Slaanesh, they were immune to panic.

The Marauder Chieftain was compelled to issue a challenge and was, unsurprisingly, cut to pieces by the Giant Slayer. Inspired by his example, the dwarfs killed 10 Marauders between them, suffering no casualties in return. In the face of a 15 - 1 victory, the Marauders broke. The Slayers pursued but the Longbeards, clearly still fired up, failed their restrained test and took of as well. The Slayers out paced them however and slammed straight into the Daemonsmith.

Chaos Turn 4
Despite being in site of their general, the Chaos Hounds failed to rally and ran through the Marauders, who, again, benefited from their immunity to panic. They may have been slightly disconcerted, however, as they failed their leadership test for rapid reform and were only able to turn around.
The Shrieker rocket targeted the Miners. The rocket went off target, but then returned, killing three miners, though they passed their panic test.

The Daemonsmith decided not to buck the trend and challenged the Giant Slayer. The two attacked simultaneously and killed each other.

Dwarf Turn 5
This almost the Dwarf's last chance for victory. The Miners charged the objective and made it. The Warriors attempted a long charge against the Marauders in the hope of slowing them down, but failed to make it. Thanks to rolling a 10 on the misfire dice, the Cannon overshot the Marauders and failed to kill any of them.

The Miners needed to roll a 4 of more to destroy the objective. They rolled a 3. No victory yet.
The rule book was a little ambiguous about when the besieged rolled to see if they destroyed the objective. It just said for every combat round they stayed in contact with it. I decided that meant friendly or enemy combat rounds, but the Miners would have to stay in contact for the whole round. So if Chaos could destroy them, they would win.
Chaos Turn 5

The Marauders charged the Miners. The Chaos Hounds failed to rally, but no-one cared about them by this point. Chakram Manflayer challenged the Miner's Prospector and cut him down. He was rewarded with even more unearthly reflexes, for a total bonus of +2. Chakram and the Marauders won the combat 9 - 3 and the Miners broke, denying them a final chance to destroy the supplies.

The Chaos army was victorious.

If the last battle looked like it was going one way before suddenly going completely the other way, this battle was up in the air until the very last turn.
It was always going to be a tough one for the Dwarfs, but they performed admirably, the Miners doing exactly what was expected of them. But they benefited from some very lucky (or unlucky depending on who was doing it) rolling. The Knights breaking and then being run down was something they could never have relied on.
The Master Rune of Swiftness was well worth its weight in points for Thane Zoe, who once again performed admirably, gaining a battle honour in the process. Chakram Manflayer continues on his path to glory although these two enemies have yet to face one another in a challenge. It can only be a matter of time.
It was striking how many panic tests were avoided by units being immune to panic. The Longbeards, Slayers and Chakram's Marauders all avoided panic tests thanks to immunity. Without it, surely at least one test would have been failed and that would have made all the difference to the final outcome.
With the Dwarf's first siege turn complete, it's time for Chaos to plan its next move.
Friday, 6 November 2015
Beyond the Lid of the Starter Box
Yesterday, my copy of the Beyond the Gates of Antares starter set arrived from Warlord.
This acquisition broke my rule not to start any new games, but, in my defence, I had been wanting to get into a squad-based sci-fi game for a while. Warhammer 40,000 seems like a mess these days and Mantic's new version of Warpath hasn't exactly grabbed me. What ultimately sold me on Beyond the Gates of Antares, was the Ghar, angry, aggressive little creatures that do most of their fighting from inside huge, vaguely crustacean, battle suits, putting them somewhere between goblins and Daleks.
I won't go through the contents of the box in detail. There are already two decent unboxing videos available. There's Warlord's own, which runs through everything but is a little rushed, and Beasts of War's, which is longer and more leisurely and has Warlord's John Stallard adding commentary.

I can't offer a comprehensive review at this stage, though I do have a few observations. The set has a lot of references to old Games Workshop games, intentional or not, which is hardly surprising given that the rules were written by Rick Priestly. The front cover art is a clear nod to the first edition Warhammer 40,000 Rogue Trader book. More subtle was the decoration of the interior sides of the box with other Warlord games products, something that used to be standard practice for Games Workshop. The box also included a leaflet introducing the world of Warlord games, that reminded me of the leaflet Games Workshop used to publish in the mid 1990s. It even includes a section at the front entitled "what is a wargame?" Warlord seeming to be pitching to an audience who may not be familiar with Games Workshop, rather than assuming that GW will do the job of introducing players to the hobby.

The quick start guide also felt very mid 1990s Games Workshop. It guides players through the very basics of the game and also, sensibly, includes decent assembly instructions for the models in the box.
One thing I didn't expect was the small piece of scenery from Sarissa precision (the company that had previously produced my Japanese shrine model). Warlord had advertised this, but stated they only had a limited number and had stopped advertising by the time I put in my pre-order, so I was pleasantly surprised to get one. I'm hoping this will lead to further collaboration with Sarissa, it would be nice to get a range of custom Antares scenery.
So far, I have only had a decent flick through the rulebook. Although the rules are fairly detailed, the basics seem quite straightforward. A lot of it involves rolling under a models statistics on a D10, with much of the detail being applied in the form of modifiers. This should make it fairly easy to start with the basics and add more detailed rules with experience.
The book also includes six decent army lists and 12 scenarios, 6 standard and 6 narrative. The only slightly disappointing thing is that the box does not include scenarios designed specifically for the models you get. I like the fact the two sides are asymmetric, with 20 Concorde troops plus drones taking on only 6 Ghar battle suits, but the two sides are not an equal points match, and a few scenarios designed to compensate for that and introduce new players to the game would have been welcome.
However, Warlord have now put out a new scenario, designed to use the limited edition model you get in the set. It's designed to use the Ghar and the Algoryns, rather than the Concorde, but includes some optional rules that allow you to use the starter set models to play it. Definitely welcome.
There is still a lot included in the box and I'm going to spend plenty of time getting to grips with it.
This acquisition broke my rule not to start any new games, but, in my defence, I had been wanting to get into a squad-based sci-fi game for a while. Warhammer 40,000 seems like a mess these days and Mantic's new version of Warpath hasn't exactly grabbed me. What ultimately sold me on Beyond the Gates of Antares, was the Ghar, angry, aggressive little creatures that do most of their fighting from inside huge, vaguely crustacean, battle suits, putting them somewhere between goblins and Daleks.
I won't go through the contents of the box in detail. There are already two decent unboxing videos available. There's Warlord's own, which runs through everything but is a little rushed, and Beasts of War's, which is longer and more leisurely and has Warlord's John Stallard adding commentary.
Two Sci-Fi games designed by Rick Priestly
I can't offer a comprehensive review at this stage, though I do have a few observations. The set has a lot of references to old Games Workshop games, intentional or not, which is hardly surprising given that the rules were written by Rick Priestly. The front cover art is a clear nod to the first edition Warhammer 40,000 Rogue Trader book. More subtle was the decoration of the interior sides of the box with other Warlord games products, something that used to be standard practice for Games Workshop. The box also included a leaflet introducing the world of Warlord games, that reminded me of the leaflet Games Workshop used to publish in the mid 1990s. It even includes a section at the front entitled "what is a wargame?" Warlord seeming to be pitching to an audience who may not be familiar with Games Workshop, rather than assuming that GW will do the job of introducing players to the hobby.

The Antares box with my, quite bashed, Battle for Armageddon box
The quick start guide also felt very mid 1990s Games Workshop. It guides players through the very basics of the game and also, sensibly, includes decent assembly instructions for the models in the box.
One thing I didn't expect was the small piece of scenery from Sarissa precision (the company that had previously produced my Japanese shrine model). Warlord had advertised this, but stated they only had a limited number and had stopped advertising by the time I put in my pre-order, so I was pleasantly surprised to get one. I'm hoping this will lead to further collaboration with Sarissa, it would be nice to get a range of custom Antares scenery.
So far, I have only had a decent flick through the rulebook. Although the rules are fairly detailed, the basics seem quite straightforward. A lot of it involves rolling under a models statistics on a D10, with much of the detail being applied in the form of modifiers. This should make it fairly easy to start with the basics and add more detailed rules with experience.
The book also includes six decent army lists and 12 scenarios, 6 standard and 6 narrative. The only slightly disappointing thing is that the box does not include scenarios designed specifically for the models you get. I like the fact the two sides are asymmetric, with 20 Concorde troops plus drones taking on only 6 Ghar battle suits, but the two sides are not an equal points match, and a few scenarios designed to compensate for that and introduce new players to the game would have been welcome.
However, Warlord have now put out a new scenario, designed to use the limited edition model you get in the set. It's designed to use the Ghar and the Algoryns, rather than the Concorde, but includes some optional rules that allow you to use the starter set models to play it. Definitely welcome.
There is still a lot included in the box and I'm going to spend plenty of time getting to grips with it.
Thursday, 22 October 2015
Unconventional Armies
I have been reading the story section of the Tamurkhan book recently. Yes, it has taken me nearly four years. I had read the rules and all the Chaos Dwarf background stuff, I just hadn't read the main story.
It's actually quite a good read, albeit a touch overwritten, with some of it trying a bit too hard to sound epic. But it does a good job of presenting a series of battles, across a variety of locations clearly and without getting too repetitive.
The story describes Tamurkhan and his armies journey across the Warhammer World, starting in the Northern Chaos wastes, before travelling South through the Ogre Kingdoms, west across the Dark Lands, into the Border Princes and then attacking the Empire from the South. In the course of the story, the Chaos Horde fights a variety of foes, including a few quite unconventional armies, such as a tribe of Mutant Savage Orcs living close the Chaos Wastes and an army of Ghouls and giant worms, lead by a Dragon that they worship as a God.
It's a welcome reminder that not every army in the Warhammer World fitted into the narrow confines of the published army books. When Warhammer 3rd edition was published, these sharp restrictions between armies did not exist. The points system was written as a tool box, allowing you to build your own custom troop types and then combine them to produce extremely varied armies. If you wanted your humans to hire Ogre mercenaries you could. If your dwarfs formed an unlikely alliance with a tribe of Giants, no problem. Want to field a Chaos horde allied with the undead followers of an ambitious Necromancer, go ahead.
All of this started to die out with the publication of the original Warhammer Armies book. Although the book was intended to provide strict army lists for tournament and competitive games, in practice everyone started following its rules. When fourth edition was published, the practice started of publishing individual army books for each army, and the divisions between them became crystallised. By the end of eighth edition, virtually every model was part of a specific army and could be used in that army alone.
In fact, this has become standard practice in most games developed by miniature manufacturers to support a specific range of models. War Machine, Kings of War, Malifaux, Infinity, Bushido and so on, all feature rigidly defined factions with each model being a member of a specific faction (though most also include a range of unaligned models usable by all). This means that each faction has its own aesthetic and play style, but doesn't lend itself to player creativity.
In contrast, rules sets that are not attached to a specific range of miniatures, such as Song of Blades and Heroes, Hordes of the Things or Dragon Rampant, necessarily offer players a great deal of freedom to build their own troop types and army lists from a range of types. When your game does not have its own range of models, it pays to make it work with as many different manufacturers as possible.
But the release of Age of Sigmar may have shifted Warhammer armies back the other way. The latest issue of Warhammer Visions features an alliance of Undead and Elves* which combines Dark Elf and High Elf miniatures and includes Elves mounted on Demi Gryphs. I don't know if their owner has made his own warscrolls for these, but I certainly hope so.
If throwing out the old army books and points values leads to more creative army building, I am very much in favour of it. Sadly, Games Workshop has already released two "Battle Tomes" that are almost army books, even if they feature no points costs. Hopefully, as Age of Sigmar develops, Games Workshop won't reimpose a needless division between armies.
*I don't know what an Aelf is and I don't want to know
Wednesday, 14 October 2015
Warhammer Siege - A quick update
I haven't had time to play Siege Turn 1 of my campaign yet. But I do have a quick update.
At the end of my last post I said that I thought Thane Zoe deserved some kind of reward for having defeated the Chaos Warrior Champion. I found the solution in the back of the Warhammer 5th edition battle book.*
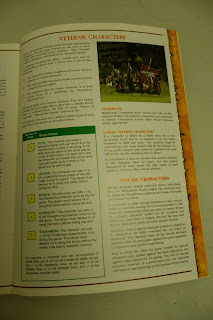
The rules give a boost to characters who win challenges against characters of equal or greater rank or whose unit captures a standard bearer or kills an army standard bearer.
I've decided to chuck out the "equal rank" rule because it doesn't apply to Chaos Champions and is a little over restrictive. I want my characters to have a shot at actually getting a Veteran bonus.
I'm divided over the capturing standards rule. The concept of capturing enemy battle standards was chucked out in Warhammer 8th edition, though, weirdly, you can still get victory points for the standards that your opponent lost. I'm inclined to resurrect the rule as I rather like it, especially as it gives you the opportunity to recapture fallen standards, which isn't possible under the official 8th edition rules.
That said, I'm not sure I want characters to win Veteran bonuses for capturing standards. To make it fair, I would have to extend the rule to Chaos characters and let them roll on the Eye of the God table. I think this would probably lead to a few too many bonuses to both sides. Realistically, no character is likely to win more than one or two challenges per game, but if you include captured standards that could double and that could lead to a lot of bonuses.
With that in mind, I think I am going to use the Veteran character rules, but only allow a character to have one for winning a challenge. And, having won a challenge, Thane Zoe can now re-roll all of her hand to hand or shooting to hit rolls once per game
*The battle book was included in 5th edition along with the rule book and included lots of background material, scenarios, campaign rules and a bestiary for the various monsters that, at the time, were usable by all armies but were not included in individual army books.
Tuesday, 6 October 2015
Warhammer Siege Introduction - Forlorn Hope
Kazad Kor was a small Dwarf hold to the east of the Karak Kadrin, of no great significance apart from its link to the dwarven underway. Lord Durak of the Irongrim clan claimed that it was an honour to guard the eastern edge of Karak Kadrin, but many of his retainers would have preferred the honour of guarding the city itself.
Thane Zoe "the Princess" Lord Durak's daughter was leading a routine patrol of the borders when she was suddenly approached by Borri, a young dwarf with good eyes. "Invaders, from the east, Chaos worshippers I think," he said. Thane Zoe considered for a moment, then sent a messenger pigeon back to the hold.
"Send the Thunderers ahead to hold the old fort at the pass. We'll join them as soon as we can. If we can hold the fort for us long as possible it will give father time to prepare."
The dwarfs said nothing, but picked up their gear and began to march.
For the first scenario 750 points of besiegers, representing the Chaos vanguard, met 500 points of besieged dwarfs. No wizards, magic items or war machines were allowed.
The Chaos army line up was as follows:
Chakram Manflay - Exalted Champion of Slaanesh
20 Marauders - Mark of Slaanesh
12 Chaos Warriors
5 Marauder Horsemen
10 Chaos Warhounds
The outnumbered dwarfs included:
Thane Zoe of Clan Irongrim
10 Longbeards
10 Quarrellers
10 Thunderers
The dwarfs had to hold one significant piece of scenery at the centre of the table (in this case a ruined fort) for four turns. If an unbroken dwarf unit was within 6" of the fort after four turns, the dwarfs would win. Anything else was a chaos victory. Because the dwarf objective was to hold out for four turns, I decided to count the turns down from 4 to 1 to increase the tension.
Deployment


Chaos Turn 4


Dwarf Turn 4

Chaos Turn 3

Meanwhile, on the Chaos right flank, the Chaos Hounds charge the Quarrellers only to lose three of their number to shooting and two more in the subsequent melee in exchange for only one dwarf. The Hounds flee, but the dwarfs hold position.
Dwarf Turn 3


Chaos Turn 2


Dwarf Turn 2


Chaos Turn 1

Dwarf Turn 1

That outcome was really unexpected. I thought the Dwarfs had had it when the Quarrelers were killed, but the Longbeards rose to the occasion as is only appropriate. On the other hand, the Dwarfs shooting, particularly the Thunderers, was pretty lousy all game, so all their luck came in the second half.
It's hard to see what else Chaos could have done. Perhaps, the Marauder should not have pursued the Quarrellers, but if they hadn't, they would almost certainly have rallied and been in a position to offer the Longbeards support in the final turn.
With the Dwarfs victorious, Chaos will lose D6 x 15 points in the final scenario.
After the battle, I decided that Chakram (and any other Chaos characters I use) could keep his reward from the Eye of the Gods. However, any chaos characters losing wounds would have to roll a 4+ for each wound to recover it. A character reduced to 0 wounds who didn't recover any would be dead and out of the campaign.
I feel like I should give Thane Zoe some kind of bonus for killing the Chaos Champion, but I'll have to think about what it should be.
Because the first scenario was Forlorn Hope, the besieged get the first siege turn and the dwarfs get to choose the next scenario.
Subscribe to:
Comments (Atom)