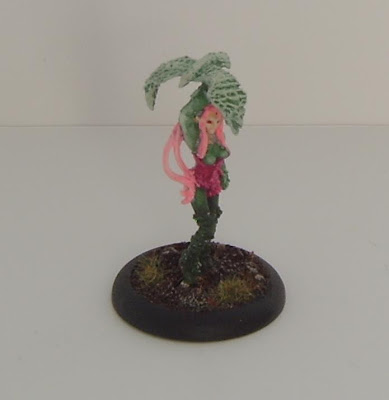
Sunday 4 October 2009

Chariots of Fire (and Brimstone)

When I started this blog it was certainly not my intention to see it dominated by one army or game quite as much as it has been, but since I have started painting my Chaos Army I have found it quite hard to stop. I have Anima Tactics models piling up and my Red Devils still have no opponents.

Sadly real life has been getting in the way of my painting lately and so I don't have as much to show off as I would like. Still here's a couple of new models that have been sitting around unpainted for years.

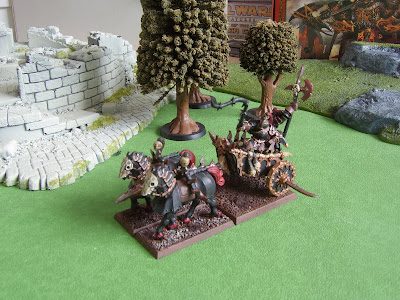
I wanted a chariot for my army since 4th edition Warhammer, but the only model dated back to 3rd edition had to be mail ordered and looked pretty terrible. So when a new model appeared during fifth edition I snapped it up.

This model was assembled and painted pretty much as is, but I added a large monster base for the Chariot, it being released long before the advent of Games Workshop Chariot bases. The base really helps the model to feel like a coherent unit somehow.

The same Chariot from the other side.
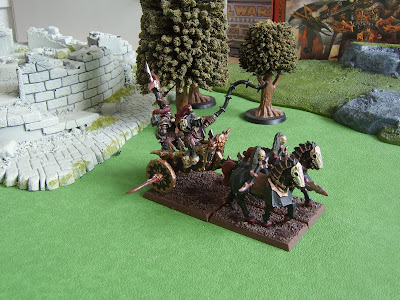
This Chariot has had a few modifications, it's steeds and crew being swapped for different models

The steeds are actually from the long dead Games Workshop game of desert-based mobile Ork combat, Gorkamorka. The Gorkamorka expansion introduced a race of mutants who rode around on lizard like beasts. These steeds are two of the beasts.

Games Workshop's old sales pattern was to release a game, flog it for all it was worth and then get rid of it in a big sale before releasing a new game. If you were wise to this pattern you could get yourself a huge amount of material for a very low price. I did brilliantly out of the Blood Bowl mega sale and acquired about five teams.

These two beasts were bought for a pound each on the basis that they looked interesting and I might use them some day. I finally decided to add them to my second chariot to make it stand out a bit from the other.

The driver was a product of a much earlier GW sale. He is actually an old Marauder miniatures Chaos Hound handler. Marauder miniatures was an odd semi-autonomous spin off from Citadel back in the early to mid 1990s. At the time it was the only part of the company producing new Warhammer models and they were a great deal better than Citadels offerings of the same period.

The Handler came in a pack with two chaos hounds and I bought three packs for a pound each in the first great Games Workshop sale (around 1994 or 1995, I'm not sure). The hounds served me faithfully as part of my Chaos Army for years, before being superseded by the new plastics. The handler now lives on as a chariot driver as he fulfilled the crucial criteria of having his own whip.

The Champion is an old metal Chaos Warrior I bought during fifth edition to lead my Marauder unit, Marauder Champions were Chaos Warriors back then. He has been kitted out with a new plastic Chaos Warrior shield and now usually plays the role of an Exalted Hero in a Chariot.

More pictures soon I promise.

Saturday 5 September 2009

Charge of the (very) Heavy brigade

At the end of my last post I promised new pictures by the end of the week and spectacularly failed to deliver. It has been, not quite two weeks since then, so apologies. On the more positive side, I now have two new Chaos regiments painted instead of one, so that means a few more pictures.

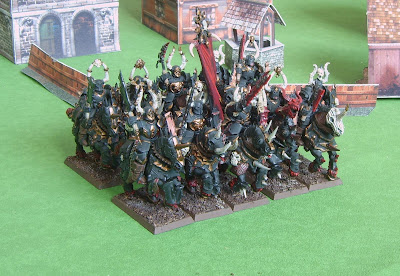
My ten strong unit of Chaos Knights in all it's glory. The units were clearly not intended to get this big, as is apparent from the fact that the bulky tails make it impossible to get them to rank up. It is fairly unlikely I will every need to use all ten in battle. So why buy them?

Bit of an indulgence really. I am something of an obsessive fan of Chaos Knights. Ever since my first Chaos army in 1994, when I bought two box sets of the newly released knights plus a command group, netting me 8 models. Given that they were 80 points each with Chaos Armour, and the Standard twice that, it was an over the top unit back then.

But I have always loved the idea of large unit of the most powerful heavy cavalry in the Warhammer game pounding across the table. The psychological impact alone is huge. I got my first five of the new knights in the Chaos battalion box. But when I ended up at the annual wargame show at the Bovington tank museum a few weeks back and discovered a box for only ten quid I couldn't resist the opportunity to double the numbers. In retrospect I should probably have assembled them as two units. Still, the big unit has tremendous visual and psychological impact.

A close up of the rear rank to show a little more detail. My first Chaos Knight Unit were armed with lances. It always irritated me that the Knights were effectively neutered in the Hordes of Chaos army book by having their lances taken away from them. It always felt, to me, like an attempt to reduce the Knights status compared to other heavy cavalry like Empire or Bretonnian knights.

Ironic then, that I ended up giving my new unit hand weapons. I ummed and ahhed over this for a while, but I went with hand weapons, or rather ensorcelled weapons because they give the Knights +1 strength and count as magic. For 5 points more, lances give +2 strength which is lost after the first round and no magic weapons. Not much of a bonus as far as I can see given that you are required to lose the ensorcelled weapons and not take both.

As far as painting is concerned I followed the same basic Colour scheme as my Chaos Warriors. Tamiya Nato black highlighted German grey for the plate armour with old citadel brazen brass for the detailed bits, of which there were rather more on the knights than the Chaos Warriors.

For the steeds I had some trouble. I wanted them black, but this did not contrast well with the armour. I considered red, but thought that might be a little too colourful for an army I wanted to look dark and grim. In the end I went with black, but painted them flat black and highlighted nato black to make them even darker.

I added some colour by painting the steeds hair red. I liked the idea that the hooves actually caught fire as they ran. These are chaos steeds after all, partly daemonic and not just conventional horses. This ended up taking ages because I couldn't bring myself to dry brush and highlighted each individual hair.

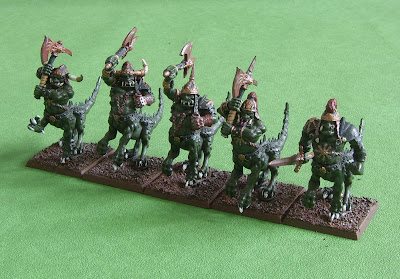
This is my 'bonus unit' the Dragon Ogres. Like the Chaos Knights, they have been a big part of my army since fourth edition. Unlike the Knights I am still using the same models. They have beaten the Marauders record and now hold the record for 'longest time between buying and painting a model.' 14 years in this case.

The Knights and these guys more or less sold me on Chaos back in 1994. Of course, as a 15 year old with very little income I had to buy them up a bit at a time. I started with three and added the other two over a year later (I honestly don't remember when). These guys had been sitting around in bits since I gave up on Chaos in sixth edition, but have been brought, deservedly, out of retirement.

They are showing their age, but for sheer bulk and character they are still some of my favourite models.

With summer activities getting in the way I have only managed to get two units down in the last two months. Hopefully I will get back into routine soon. I have my first Chaos character all but done, I still need to finish his base, so more pictures soon. I also have, potentially, something big to write about. Not a new model, but something rather different. I won't be any more concrete or set a definite date for posting more, because I am conscious of failing to meet it.

I will post more when I have the chance.

Monday 24 August 2009

Something of a different style of entry today. So far this blog has essentially been a record of my modelling and painting projects, but I always intended to make it somewhat broader than that so this entry takes a more philosophical approach. I promise more Chaos pictures by the end of the week. Assuming anyone is actually reading this and I am not just writing to myself.

Back when Games Workshop released its fifth edition Warhammer 40,000 rules, designer Jervis Johnson wrote the following in his column for White Dwarf:

“When we started on the new rules we decided that we shouldn't compromise the new rules out of fear of over-competitive players (or “rules lawyers” as they are known in the trade), but instead we should develop the rules we'd personally like to use ourselves. As long as the rules worked well in our games, then all we needed to do was explain to other players how to use them in their games.”

This was widely taken as an attack on the more competitive tournament players and seen as a signal that the Games Workshop studio was going to shift its focus to cocentrate on 'fun' at the expense of rules balance.

I think there is some truth in that statement, but looking back on it now, over a year later, it seems more like a defensive statement justifying the change in presentation of the rules that was to come, not just in Warhammer 40,000, but in all Games Workshop games.

Allow me to present a specific example from the Warriors of Chaos army book (forgive me, but I have Chaos on the brain at the moment). The rulebook contains a rule called 'Eye of the Gods.' This requires Chaos characters and champions to issue challenges to personal combat whenever they are able and accept them when offered. This strikes me as a pretty characterful rule. Chaos characters are the worshippers of vengeful Gods whose motivation is based entirely around attracting there attention and there is more glory to be gained in defeating enemy heroes than in slaughtering the nameless rabble.

This is how the rule is presented in the army book exactly as written:

“Chaos models that may issue challenges must do so whenever they are able. Furthermore, such is their thirst for glory that Chaos characters may not refuse challenges.”

That isn't the whole rule, but it is the most important part for the example I wish to discuss. On the face of it this is all pretty simple. A Chaos character or champion must issue a challenge whenever he can and accept a challenge when offered.

Actually this second part is less clear. If you read quickly you can easily gloss over the crucial word in the second sentence “Chaos characters may not refuse challenges.” Champions are not actually characters, they are actually an odd kind of hybrid regular trooper that uses the Character rules for challenges and being hit by missile fire, but they are not, strictly speaking, characters. I have to admit that I didn't even notice this second point until I read it in the FAQ published on the Games Workshop website.

So, strictly speaking, the rule states that all Chaos Characters and unit Champions must, when they are able, issue a challenge. When a challenge is offered, characters must accept, but Champions may (but don't have to) refuse. So far so good.

Now, to cite an entirely un-hypothetical example.

In a recent Game I played my Warriors of Chaos against my brother's Ogres. In this game I used a unit of Chaos Warriors including a Champion and accompanied by a Chaos Sorcerer. The unit was charged by a unit of Ogre bulls.

As per the Warhammer rules only one challenge may be issued per combat round. The procedure is that the charging player may issue a challenge on behalf of one character or champion in the charging unit, which may be accepted or refused. If they do not issue a challenge one character or champion from the unit receiving that charge may issue a challenge.

The Ogres did not issue a challenge requiring my Champion and Sorcerer to issue a challenge as per the 'Eye of the Gods' rule. Of course they can't both issue challenges, only one challenge can be issued per combat phase and in any case there weren't enough enemy characters of champions to go around. So I issued a challenge on behalf of my Champion, not wishing to see my Sorcerer ground into a soft meaty paste by the club of an Ogre Crusher.

I assume that this is acceptable as both characters are obliged to issue challenges, but only one legally can. If the Champion issues a challenge the Sorcerer is no longer 'able' and, as written, there is no pecking order.

This wasn't really a problem, a loop hole or an error, just an ambiguity that I would have liked to have seen clarified. However, the plot thickens had the Crusher issued a challenge.

If a challenge is issued the player on the receiving end has two choices, accept and nominate a character or champion to fight the challenge, or refuse and allow the challenging player to nominate on of his champions or characters to sit out the fight.

My Champion is not obligated to accept challenges, but my Sorcerer, as a character is. Does this mean that I cannot refuse the challenge as the Ogre player could nominate the Sorcerer, who may not refuse, to sit out the combat or does it mean that I can refuse, but that only the Champion can be nominated to sit out the combat? What does that mean if I accept. Can I accept with either model? Or must the Sorcerer accept as he is obliged to accept and the Champion is not?

The thing is, this situation is not uncommon. Most units that contain a character will likely contain a champion as well and many may contain two characters and a champion. What happens when two units are involved in the same combat? Or when a character fights seperately but is drawn into another combat involving a unit containing a character? This must have come up in play testing.

It isn't a situation that is hard to clarify. The first minor ambiguity could be resolved with a single sentence of the form:

“When a combat involves more than two models capable of issuing a challenge the controlling player may choose which one issues the challenge.”

The second is slightly more tricky, but can still be resolved in a single sentence.

“If a combat contains a chaos character and a champion, a character must accept any challenges issued.”

Or, alternatively:

“If a combat contains a chaos character and a champion, the Chaos player may choose whether to accept with a character or a champion, but one model must accept.”

Depending on the interpretation you prefer.

The fact that Games Workshop chose not to clarify the rule says something about their policy towards rule design and presentation.

I think that when Jervis Johnson was writing about not 'compromising' the rules he was really referring to making them unambiguous. I think that the GW design studio believe that unambiguous rules look complicated and that complicated-looking rules, while appealing to so-called 'rules lawyers' were actually putting off more casual, and particularly, younger players that Games Workshop are trying to attract.

They may not be entirely wrong in their assessment. Here is a quotation from the rules for De Bellis Antiquitatis (or DBA) an historical wargame to cover ancient and medieval wargaming and so not a million miles from Warhammer in style. They are also described as “simple” and “fast play.” This rule refers specifically to bonuses to combat rolls:

“Pikes add +3 and Warband +1 when in frontal close combat against any enemy except Cavalry, Light Horse, Scythed Chariots, Bows or Psiloi, and Spears add +1 if in frontal combat against Knights or Spears, if in either case they are supported by a friendly element of the same type lined up directly behind and facing the same direction, and neither supported nor supporting element is in bad going.”

I should note that in DBA several models are placed on one stand and referred to as an 'element' or a particular type.

If you look closely at that sentence, everything you need to understand when to apply the bonuses is there, though the multiple clauses make for difficult reading and understanding.

I mean this as no slight to DBA which is an enjoyable game that justifies its claim of being simple and fast play and which, admirably, includes all the rules, army lists, a campaign system and terrain set up all in 52 A5 pages for only £5.

But in an attempt to avoid any ambiguity and to minimise the possibility of situations not covered by the rules, the designers have managed to write some sentences that take serious work to decipher.

In contrast, Games Workshop would rather maintain superficial simplicity and the appearance of a fun and simple game than avoid situations not covered by the rules. Personally, I think good wargame design lies somewhere in between, but if given the choice I would rather try and decipher a difficult sentence to find a rule than to discover that no rule exists to cover a common situation.

Monday 20 July 2009

Chaos Rising

In my last post I mentioned that I was taking a break from Samurai to paint some Warhammer Warriors of Chaos. Here are the results so far (with a few random games and action figures from my hobby room in the background):


Between four and five units complete so far. Four if you count the Chaos Hounds as one unit, five if two, I will probably vary them depending on circumstances.

My Chaos army actually dates back as far as 1994 and was actually the second Warhammer army I ever collected. The models have changed a lot in that time, but I still have a few left overs from my original army.

I was inspired by the battle report in White Dwarf 176 when the newly released Chaos army took on the Dwarfs. Two major components of that army were a unit of Chaos Knights and a Unit of Dragon Ogres and it became my goal to get big units of each for my army.

The Dragon Ogres had to wait as they were £9 each and back then that was a lot for a single model. My initial army was bought at the 1994 Games Day with birthday money and contained 8 Chaos Knights, one unit of 12 beastmen (including a Shaman), one unit of 10 Beastmen (plastic) and a Chaos Sorcerer riding a disk. Thanks to a generous birthday present from a friend I added 8 Plague Bearers. Back then the Chaos Army was a wild mix of all different kinds of troops with beastmen, daemons and warriors mixing freely. Marauders hadn't been thought of (actually they had, but were pretty different from what they became).

My army grew pretty rapidly, adding plastic Chaos Warriors, more daemons and, eventually, my Dragon Ogres. I started with three, but eventually upgraded to five. My army remained almost entirely unpainted, however.

In 1997, Games Workshop decided to rejig the Chaos Army dividing it into the separate Beasts, Warriors and Daemons we see today (though all three were covered in one army book). They also released the first multi-part plastic regiment box in the form of the Chaos Warriors. I snapped up two and set about reworking my army adding Marauders and two Chariots. My beastmen were quietly retired.

I never got on with the 6th edition army list. Partly it was the use of 'of Chaos' left and right. No Chaos Warriors or Chaos Knights any more, now it was 'Warriors of Chaos' and 'Knights of Chaos.' This always sounded pretentious and the fact that only one unit of each could have Chaos Armour really irritated me as did the removal of the option for Chaos Knights to carry lances. Despite attempts to revitalise my army, including the purchase of a Giant, my Warriors stayed in the draw for fifth edition.

The new Warriors of Chaos book is a huge improvement in my view. Not too happy that Daemons have been given their own army (it never made sense to me that armies of Daemons would be wandering the countryside) but I didn't really use them anyway. And my Dragon Ogres were well and truly back where they belonged. So with a new Army book and a battalion box acquired I set about reworking my army once more.


The Chaos Warriors were completed first and were a good test for my planned colour scheme.

I like my armies to have a consistent look and so keep to the same palette of colours. With a very uniform army, like my Dwarfs, I will stick to the rule that the same types of things are painted the same colours. So all cloth red, chain mail and metal metallic grey, leather black, fur brown. Though hair colour is always varied for some added realism.

For a more undisciplined army, like my Greenskins, I will stick to the same palette of colours, so blue, brown and black and the same shade of each, but vary where the colours are painted. So one Orc might have a blue tunic and brown trousers with black boots and another will have a brown tunic, blue trousers and black boots, with a third having a blue tunic, black trousers and brown boots. This helps the army stay coherent, but makes them look unruly.

For Chaos I wanted my army to have a dark and grim look. The other approach is to go very bright and colourful, but I preferred grim and forbidding. With that in mind I stuck to black and grey with leather in dark brown. Although the uniform look might not seem appropriate for a Chaos army, I reasoned that it was more an effect of necessity. My Warriors simply didn't have access to dyes and had to make do with what they could. I did, however, decide that scraps of cloth, including banners could be painted red to add a little colour.

This Chaos Warrior close up shows a little more detail.

I learned recently that the best way to paint smooth, plated armour of the type used by Chaos Warriors is to highlight the edge of the plates, as well any ridges. I'm not sure why this works, as I always assumed that you should highlight the raised areas on a model and the edges are normally not raised. But the effect seems to work.

Painting black has become immeasurably easier for me since I started using Tamiya paints. Games Workshop only produce Chaos Black and their darkest grey, codex grey, is not particularly dark. When painting a single model this isn't much of a problem as the colours can be mixed. But mixing large quantities in order to paint an army is a major chore and maintaining colour consistency across a unit, let alone a whole army, is impossible.

Tamiya, however, produce a colour called Nato Black, a slightly off black colour that doesn't dry as glossy as plain black and looks more real. They also produce German Grey, a much darker grey than Codex Grey. The Chaos Warriors armour was painted Nato Black and highlighted German Grey.


The Chaos Marauders show rather more brown and flesh tones thanks to being more lightly armoured. The metal areas were painted terracotta, a red-brown colour that Games Workshop, criminally, discontinued a while back. Fortunately I stocked up. After the terracotta they were drybrushed boltgun metal. The traces of red-brown produce a quick and easy rust effect.


This Marauder unit is made up of models that date back to the fifth edition Chaos Army book in 1998. I waited weeks for them to be released and the release date was put back by two weeks, forcing me to make an additional trip to Games Workshop. I bought up 20 in one go on the day of release.

There were actually four different models, but some how I managed to not get any of one of them. Consequently it's pretty tricky to arrange the unit so that two identical models are never next to one another.

Having bought these in 1998, they have had the longest gap between purchase and painting of any of my models. Though my Dragon Ogres will over take when I get to them, they date back to 1995.

Each unit of Marauders took over a week to finish, in contrast, the Chaos Hounds took two days. The bulk of them is fur and that was drybrushed. A little highlighting covered the bare skin and that just left scales, tails, scars and bone to paint, none of which took long.

I am currently hard at work on my ten strong Chaos Knight Unit. In painting time they sit somewhere between the Hounds and the Marauders. More pictures when they are done.

As usual, these pictures plus more can be seen at photobucket.
Sunday 28 June 2009

The Red Devils march

After more than two months of on and off painting my Warmaster Medieval Samurai army is complete.

Well I say complete...

This army is made up of the miniatures from Baccus Samurai starter army for Warmaster Medieval, with the exception of me leaving out one unit of foot Samurai. The reason for this is that Baccus actually make two types of foot Samurai, advancing and charging. A 1,000 point Warmaster army can contain 4 units of foot Samurai and I want 2 of each. However, the starter army came with 3 advancing units. So, with the first batch complete I now have to order 2 more Samurai units.

This is actually only the beginning of my plans. My Red Devils need someone to fight and so I will have to start work on a second samurai army, again of about 1000 points. My current plan is to do one based around the Shimazu clan of Satsuma who were famous for the feigned retreat tactics and made good use of snipers. It was a shimazu clan arquebusier who gave Ii Naomasa the wound that ultimately killed him.

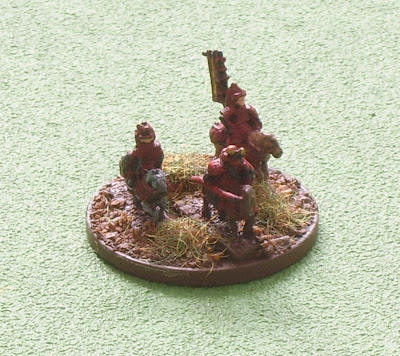
This is a unit of mounted Samurai. In Warmaster they count as shock cavalry which means they are based facing the narrow edge of the base. This allows more stands to get into combat for extra impact. I have two of these painted up, the maximum allowed in a 1,000 point army.

They have been painted with completely red armour, like the foot samurai, but I tried to vary the colours of the horses with a few different shades of brown or grey and one or two black.

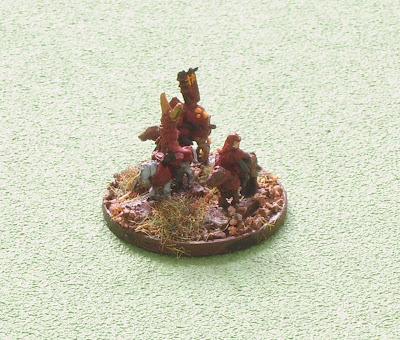
Ii Naomasa himself, though he could also represent his son Naotaka if necessary. He is shown here with an attendant carrying his gear in a horo, or large sack and accompanied by a messenger. In reality a Samurai of his rank would have been accompanied by a hundred or more attendants, weapon bearers, messengers, etc. These two are just a sample.

The golden horns were an addition to the model made with green stuff. They look a little crude, but work well at a distance. Remember this model is 6mm scale and is less than a centimetre tall. The horns were absolutely compulsory, given that Naomasa is famous for wearing them.

Naomasa is based in the traditional Warmaster character fashion on a 2p coin.

Kimata Morikatsu, one of Naomasa's closest retainers. He was assigned to him by Tokugawa Ieyasu himself and served Naomasa then Naotaka for the rest of his life.

His official role was as commander of the Red Devil vanguard and the most senior Taisho. This term doesn't translate perfectly, but can be considered equivalent to general.

In Warmaster terms he is a Samurai hero. He is based on a 2p like Naomasa.

The army here is arranged in an approximation of the Hoshi formation. This was a common attacking formation were missile fire would break up the enemy before mounted Samurai charged in in a wedge formation.

At the front we have three teppo formations, mixed missile troops with hand guns and bows. Directly behind them in the centre are two Mounted Samurai units acting as the vanguard. Their commander, Kimata Morikatsu, is directly behind them. They are supported by a second division of foot samurai directly behind on the left and right.

On the left and right behind the teppo are Yari Ashigaru, low class fighters with long spears who fought like pikeman and guard the flanks.

Behind the Samurai is a middle division of more Yari Ashugaru, with the commander, Ii Naomasa behind them. This was quite common for Samurai armies. The general would rarely engage in front line combat, instead watching the unfolding battle from a camp at the rear and issuing orders.

This was not a question of keeping him safe, but more about ensuring that the battle was well directed. If the battle was lost the losing general would probably commit suicide in any case.

Of course Ii Naomasa had plenty of opportunities to see front line combat, as he would usually command one part of a larger force usually under the command of Tokugawa Ieyasu. This formation shows how they might have fought if the Red Devils fought alone.

At the back is a supporting Teppo Ashigaru unit to guard the rear.

I don't have quite enough units for a proper Hoshi formation. There should be a clear bodyguard covering Naomasa on both sides as well as two rear flanking units and more missile troops at the back, but it gives some sense of how the army might have deployed. Whether this would be an effective formation for Warmaster is less certain.

As before, I have more pictures on photobucket. Take a look at them here

With the Red Devils finished I am taking a break from painting 6mm. I have actually started work on painting a Warhammer Chaos army. Most of the models have been hanging around unpainted for ages so I thought it was about time I got them finished. Once they're done I'll be ordering more Samurai and hopefully soon have enough for a full scale battle. Watch this space.

Wednesday 17 June 2009

Hikone castle rises

Ever since I decided to put together a Samurai army I wanted a castle to go with them.

When I decided on 6mm scale it became even more important. The reason for this is that, while I have a lot of scenery for 28mm scale, much of it isn't really transferable to 6mm scale. The hills are fine, they just become bigger hills or even mountains. But 28mm forests don't work so well. I have seen people use large scale trees with their small figures and while they are fine for gaming purposes, they never look quite right.

Most importantly, I needed buildings, specifically Japanese style buildings in the right scale. This is easier said than done. Not many manufacturers make 6mm Japanese buildings. In any case, I was keen to save some money and wanted to do it myself.

Starting with the castle was probably not a sensible idea. But I like a challenge and loved the idea of my army of Samurai lined up with the castle in the background.

I ummed and ahhed for some time before deciding on a castle to model. I thought about creating a generic castle, but was worried that it wouldn't look authentic. I considered Gifu castle, because the Red Devils had fought there and seen some action.

But in the end my eyes were drawn to Hikone castle. This was the castle of the Red Devils themselves and, fortunately, one of the few Japanese castles to still be substantially authentic. Most are reconstructions. This meant I could find lots of nice photographs of the castle for reference.

Of course when I say 'castle' I am really referring to the keep, the large central building within the castle compound. The whole castle is made up of dozens of buildings surrounded by walls. I plan to do more buildings and some walls, but I had to start somewhere.

Hikone Castle keep as it appears today

Hikone wasn't constructed until after the battle of Sekigahara, and was not completed until after Ii Naomasa's death, so it was almost certainly never besieged. Using it in battle would be necessarily anachronistic. But I decided I didn't care. I could play an 'alteranate history' game or use it to stand in for another castle. The chance to build the Red Devil's own castle to go with the army was too good to pass up.

Unfortunately I had a great deal of trouble finding any plans or blueprints for the castle. In the end I relied on a dodgy translation of the Hikone city website, that stated the castle was 21 metres tall and measuring numerous photos to work out the scale of everything. The results are less than precise, but should do for gaming purposes.

I also wanted to be able to put models inside, so I decided to build it with three seperate detachable floors. I am clearly insane.

I started by making the walls of each floor using foamboard (two thin layers of card with a layer of foam in between). Foamboard is nice and thick and can be pinned easily for extra stability. I then gave the first two floors a flat roof. This allowed the second floor to sit on top of the first and the third to sit on top of the second. The flat roofs were made using 1mm thick card.

After that I made the curved roofs out of more thick card. These had to be carefully cut to match the design of the castle and still allow each floor to be detached.


This work in progress shot shows the keep at this stage. At this point I made a major blunder. I measured the heights for each floor, taking into account the added depth needed to clear the roof of the floor beneath. Unfortunately, I screwed up the second floor and made it 10mm too short. It dissapeared under the roof of the first floor. I ended up having to scrap the whole second floor and start again.

After that I neede to texture the roofs. I spent a lot of time looking around for appropriate thin round objects to stick to the rooves to give them an authentic look. In the end I settled on barbecue skewers, which were probably a bit too thick, but look okay in this scale. I cut them into small pieces and glued them on to the rooves covering up any visiable card.

I added windows and wood panels with more card. Finally I had to build the base. All Japanese castles are built on a mound of tightly packed stones for added defence. These mounds are fantastically tough and in many cases the mound of stones is now all that remains of the castle. I build my mound using more foamboard with a flat card 'roof' for the castle to sit on top of.

Completed, but unpainted castle.

Finally I painted it. This wasn't too hard as the castle is mostly black and white. I gave the whole think an undercoat of black primer before painting the walls in two coats of white. The roofs were touched up with more black, to give them good coverage before being drybrushed, first with Tamiya Nato black and the German grey. Finally, I gave the windows a quick go with German grey to simulate pains of glass.

Painted Keep

So far, I have only partly textured the mound, by gluing a layer of small stones. I intend to add smaller stones to fill in the gaps before painting.

Painted keep with partly texture, but unpainted mound

This was an ambitious project and took the better part of a month to complete. I still need to add more, I think a few extra details, like the gold stars on the original castle would look good, but I have to figure out to do them. I also intend to add more buildings, the keep has at least two further buildings attached, and no castle would be complete without some walls.

First, though I think I will do some smaller buildings that I can use as a village. After the Castle that shouldn't be too challenging.

I am very pleased with the three level effect. It means that a good six warmaster stands can be placed inside the castle ready to defend it. Given that Warmaster Medieval has siege rules, this is quite a tempting prospect.

The three levels of Hikone castle keep

If you're interested in seeing any more pictures of the model you can find them here: http://s663.photobucket.com/albums/uu353/Humorous_Conclusion/Hikone%20Castle%20model/

Hopefully, I will have pictures of my completed Ii Red Devil army soon.

Friday 12 June 2009

The Ii Red Devils (in 6mm)

A while back I mentioned that I had been looking into collecting Samurai models and here are the results.

These are 6mm scale samurai from baccus miniatures. For my first historical wargames army I choose to build an army for Warmaster Medieval - Games Workshop's recent rejig of the Warmaster game to cover Medieval armies. I choose this game for two main reasons, firstly I really like the fantasy version and it's grand scale approach to warfare. Secondly, because they have actually bothered to produce a Samurai army list, which few others have managed.


Fields of Glory are doing one and you can get one for DBM, but I find both of these games a little fiddly and over fussy.

Of course Warmaster is designed primarily for 10mm scale. But I choose 6mm scale because I it makes for even larger and more impressive forces and because Baccus is dead cheap. I picked up a 1000 point army at Salute for only £40 (including the cost of the bases). A 10mm scale army of the same points value would have cost as much as twice that.

These are Senngoku Jidai (or age of warring states) Samurai. This period encompasses the 16th and early 17th century and was a period of near constant civil war as well as great military change. The Samurai became less important as new weapons such as the arquebus, brought by Portuguese traders, placed greater emphasis on large formations of lower class retainers called Ashigaru.

Unit of foot samurai armed with yari (long spears).

Yari Ashigaru unit. The difference between the models in this scale is not huge. The Samurai are slightly heavier armoured. So I painted the somewhat differently to make them stand out.

Ashigaru Teppo unit. Teppo was the Japanese word for Arquebus. Though it's hard to see here, this unit actually includes both arquebusiers and archers. This was quite common during this period as the archers could keep up fire allowing the Arquebusiers to reload.

A unit in Warmaster consists of 3 stands of 40mm X 20mm. The number of models on the stand doesn't matter as long as the stands are the same size. In this last image the stands are positioned side by side for maximum fire effect.

As can be seen, the painted detail at this scale is pretty low. The point is to make the models look good (or at least decent in numbers).

I choose to make my Samurai army represent the army of the Ii clan as lead by Ii Naomasa. It took me quite a while to come up with a theme for my army. I was very keen to ground it in some kind of historical fact. I'm not a purists, but I didn't want my army to stand out as obviously ahistorical and I wanted a good hook to build my army around.

I found my hook in the rather excellent Samurai the World of the Warrior by Stephen Turnbull and published by Osprey (they of the million and one military history books). This is an unusual Osprey book as it is something of a prestige piece of over 200 pages, though it contains the usual excellent illustrations and photos. I picked it up in a discount bookshop in Brighton for an absolute bargain price of £5.99. It's a great overview of the Samurai class as a whole through its history and a nice introduction if you're thinking of getting into Samurai wargaming.


In one chapter I stumbled across the story of Ii Naomasa and immediately grabbed it for my army concept. I am surprised the story hasn't been turned into an Anime or Manga, it seems so ideal.

At the start of the 16th century the Ii family were retainers of the Imagawa family, who had ambitions for conquest. This lead them into an attack on the province of Owari. At the time this was ruled by a minor Daimyo (warlord) called Oda Nobunaga. Unfortunately for the Imagawa, Nobunaga was to become the first of three great unifiers of Japan and would have conquered the whole country if he had not been assassinated by one of his own generals.

The attack turned into a disaster and the heads of the Ii and Imagawa clans were both killed at the battle of Okehazama.

This disaster lead the new head of the Imagawa, Imagawa Ujizane to become somewhat paranoid. So much so that he accused the Ii of plotting against him. He had the head of the family and his brothers and sons murdered. Only his grandson, the four year old Ii Naomasa survived, hidden in a buddhist Monastary by his aunt, who was a Nun.

When he grew to adulthood Naomasa went seeking his fortune. With no way to reclaim his ancestral lands he offered his services to another local Daimyo. He fell in with Tokugawa Ieyasu. This turned out to be astute, Ieyasu was the third great unifier and would go on to found the Tokugawa Shogunate that would rule Japan for 250 years.

Naomasa proved valuable to his master , saving him from an assassination attempt in 1576 and helping to capture Takatenjin castle in 1581. He rose quickly through the ranks.

Naomasa fought with Tokugawa at the battle of Nagashino were the Takeda clan were defeated with ranks of arquebus fire. At that battle Naomasa observed the Takeda retainer Yamagata Masakage in action. He dressed his followers in red armour and Ieyasu suggested that Naomasa follow the practice. Naomasa did, but took it to even greater extremes. His samurai were clad entirely in red lacquered armour, right down to their spears. This was unusual for Samurai armies, which generally did not adopt any standard uniform. Naomasa himself took to wearing a helmet with huge golden horns.

A reconstruction of Naomasa's famous golden-horned armour

The red armour and reputation for ferocity of the Ii troops caused them to be nicknamed the Red Devils. Naomasa himself was sometimes referred to as akaoni (literally red devil).

Naomasa fought for Ieyasu for a numbr of years and ultimately at the battle of Sekigahara, which established Ieyasu as Shogun. Naomasa received a bullet wound in the elbow at this battle which Ieyasu tended to personally, suggesting something of the high regard in which the soon-to-be Shogun held him. Naomasa was well rewarded after the battle with lands in Omi province. But Naomasa never fully recovered from his wound and died in 1602. He was ultimately succeeded by his son Ii Naotaka who maintained the family tradition and the Ii family would continue to be influential up until the fall of the Shogunate in 1868.

The Red armour was enormously appealing for me, both because it looks striking and because I have painted an all red army before (Warhammer Dwarves) and know how to do it. Along with Naomasa's own story this made for a highly characterful army.

So far I have two each of the Yari Ashigaru and foot Samurai as well as four units of Teppo Ashigaru complete. I still have two more Ashigaru, two more Samurai, 2 units of mounted samurai and the army commanders to paint. Once these are done I will post some pictures of the complete army in all its red-armoured glory.

Sunday 3 May 2009

Never steal from Trolls

Something of a departure from my usual stuff, here is a scenario I devised for Anima Tactics. I came up with it principally so I could use this model:
He's a Cave Troll produced by Heresy miniatures and I honestly think he's one of the best fantasy models ever. Though my painting hardly does him justice.

Heresy are a great little company that produce a range of different sci-fi and fantasy models with no particular game in mind (though a number of them will stand in well for models produced by Games Workshop. I bought the Troll simply because I think he's stunning and with no particular plan in mind for what I was going to do with him.

Then this rather mad idea popped into my head. I should warn you that it is intended to be fun and is not particualarly fair or balanced, so try at your peril and don't expect a tournament level game.

The idea is that the Troll throws up an independent problem/ challenge for both players and they will have to figure out how to deal with it if they are going to win.

The Troll Hoard


I came up with this scenario because I really wanted to use the fantastic Heresy cave troll in a game. It is intended to be a bit of fun and is not particular balanced or fair. The troll adds a (hopefully) enjoyable random element to the game and should be tough enough to put players off casually attacking him. If you don't have the Heresy model you can use any model you like to represent the troll, it doesn't even strictly have to be a troll, any decently large monster model will do.

Two parties of characters have discovered a valuable cache of artefacts, treasure and other useful items and both intend to help themselves before the other party. Unfortunately, the cache is the hoard of a large, vicious and bad-tempered Troll. Before they can make off with the treasure the two teams are going to have to find a way to deal with the troll.

Parties


Each player selects their force as normal. The two sides are equal but can be of any size agreed by the players.

Tabletop


It is recommended that this scenario is played on an area 48" by 48", though it can be played in larger of smaller tables. An object must be placed in the centre of the table to represent the Troll's hoard. This can be any object that the players choose, but should be no bigger than about 3" across, and no smaller than about 1" across. The hoard is impassable, but does not block line of sight.

Scenery may be set up in any agreed manner. The scenery does not have to follow any particular pattern, but it will look particularly good if the table is made to look like an underground cave, with rock formations, stalagmites and so on. Troll's do not much like sunlight and generally prefer to stay in doors during the day time.

Deployment


The Troll must be placed within 8" of its hoard. Roll dice to determine which player places the Troll, with the high roller choosing whether to place it or not. The player who does not place the Troll chooses which side of the four table edges to deploy on, with the other player taking the opposite side.

Deploy as normal, alternate placing characters with the player who choose deployment edges going first. Characters may be deployed in an area up to 4" from their edge, and at least 12" from the sides.

Special Rules


The Troll


The Trolls profile is as follows
Troll
Creature - Wanderer
Attack: 5
Damage: 10
Defence: 10
Armour: 3
Life Points: 25
Resistance: 10
Speed: 8/12
Action/ Recovery: Special
Special Abilities:
Damage Resistant Creature: Cannot Dodge
Regenerate: The Troll automatically gains level 1 healing at the end of its activation.

The Troll is not affected by the following state effects: Haste, Poison, Doom, Slow, Seal. It can be paralysed, in which case it simply does not activate. It can be given berserker in which case it gains the bonuses to attack and damage, but it's behaviour does not change (it generally charges and attacks the closest enemy model anyway).

If the Troll is eliminated place it on its side. At the start of the recovery phase roll a dice. If you roll an 8, 9 or 0 the Troll recovers to 2 LP and stands back up.

Claw Swipe: The Trolls attacks affect all characters within 2" of it's base.

Special) Rock Throw (Ki, Ranged Attack): Distance attack (range special).

Activation.


The Troll is not controlled by a player and does not use action points. It activates once a turn. When it activates and what it does when activated will depend on circumstances.

  • If the Troll is within 2" of a character at the start of the action phase it will activate before any other character and attack (remember the Troll's attacks effect all models within 2" automatically).

  • If at the start of the action phase a model is within the Troll's control zone, but not within 2", it will activate before any other characters and charge them. The Troll does get the bonus for charging when it does this. If more than one model is within the Troll's control zone it will charge the closest. If two or more models are equally close randomly determine which one the Troll will charge.

  • If a character ends its activation within the Troll's control zone and the Troll has not already activated, it will activate as soon as that character's activation is complete, charge them and attack. It does get the bonus for charging. Remember that the Troll still only activates once per turn, so it will only attack the first model to enter its control zone each turn.

  • If all other characters have activated and the Troll has still not activated, it will activate at the end of the action phase and patrol. Move the Troll 8" in a random direction (you can determine the direction anyway you like, using a dice marked with arrow, a random spinner, a d12 and a clock face or any other mutually acceptable method). When patrolling the troll will not move more than 8" from it's hoard. If it gets to 8" away from the hoard it will stop. The Troll is the only character able to cross it's hoard and it's movement is not slowed by it. However, if it cannot move completely over the hoard in one turn it will stop at the edge. Note. This rule only applies when the troll is patrolling, it can move more than 8" from the horde when charging another character (this means it can be a good idea to lure the Troll away from it's hoard). If the Troll starts patrolling more than 8" from it's hoard it will not move randomly, but will instead move directly back towards its hoard. If the Troll ends it's activation with an enemy character inside its control zone it will not attack until the next turn.


  • The Troll has an excellent sense of smell and will react to and attack hidden characters. They still count as hidden if attacked by the troll and cannot be seen and targeted by other players.

    Rock Throw. If the troll is targeted by a ranged attack it will pick up a rock and throw it at the character who attacked him. This is a ranged attack with an unlimited range (effectively it has the same range as the attack that triggered it). The troll does not need line of sight and can even target hidden characters with this attack. Rock throw does not count as an activation and the Troll can do it any number of times a turn.

    Note. This rule was added to stop players from using ranged attacks to pick off the Troll from a distance. A Wissenschaft party in particular could seriously unbalance the scenario using this tactic.


    The Hoard


    At the start of the game take a pack of playing cards and take out one king, one queen and one jack for each player, add one joker (so if there are two players there should be two kings, two queens, two jacks and one joker). Shuffle the cards together and place them at the side of the playing area. These cards represent the various items in the troll's hoard.

    If a character is in contact with the Troll's hoard at any point during it's activation it may spend one action point to search the hoard. This counts as an action and a character may, therefore, not interrupt an action to do this (For example. They can't move into contact with the hoard, search and then move away in the same turn).

    The player controlling the character draws a playing card from the pile. They may look at it but do not have to show it to any other player. This card is kept with the character and they may only carry one at a time. If they wish to search again they must discard the card they are carrying and remove it from play (not returning to the pile of cards that are being drawn from) before drawing another.

    If a character carrying a card is eliminated in close combat the character that eliminated them may to choose to take their card. If they have a card of their own they must discard it. They must decide whether or not to do this before they look at the opposing player's card. If they choose not to take it the card is removed from play (not returned to the pile of cards that are being drawn from).

    If a character is eliminated by a ranged attack or another game effect (such as doom) any cards they are carrying must be removed from play.

    At the end of the game players received bonus victory points for cards still in the possession of their characters. The amount of victory points is dependent on the type of card:

    Jack - Worthless object - 0 VP
    Queen - Minor artefact - 20 VP
    King - Major artefact - 50 VP
    Joker - Lost loggia - 100 VP

    Victory


    Work out victory points as normal. Add the bonus points from the Treasure cards. Remember that if a character is eliminated any treasure cards they were carrying must be discarded and or taken by another character if they were eliminated in close combat. Neither side receives any victory points for characters eliminated by the Troll.

    Variations


    If you are playing the game with particularly large parties you may consider using two Trolls. This will add an additional challenge and prevent players from simply eliminating the Troll quickly and helping themselves to its treasure
    Even the mighty Konosuke has trouble with the Troll

    Have a go at the scenario if you like. I have had a crack at myself and will hopefull have a battle report for you soon. Unfortunately when I tried out the scenario a number of my models weren't painted (including the Troll himself!) so I am planning to reshoot the photos I took with painted models. Watch this space.

    He's a shiny golden god

    Quick post to show my newly acquired and painted model of Odin Goldsmith from Anima Tactics.

    He's another Empire model and the largest Empire model so far, using a large sized base. Pricey too, at £16.99 for a single model. Nevertheless he does look particularly cool and will make a stunning centerpiece for my Empire force, even if his rules don't quite back up the impression (he's only Level 50).

    I base coated him in Tamiya Flat Brown before highlighting that in Red brown. I then went over the details in GW shining gold before highlighting that with a touch of white. The overall effect is not really as subtle as I would have liked, but the contrasting deep brown with gold does look rather splendid.

    Sunday 26 April 2009

    More Anima Tactics

    Here are some more of my Anima Tactics miniatures for your approval or not.

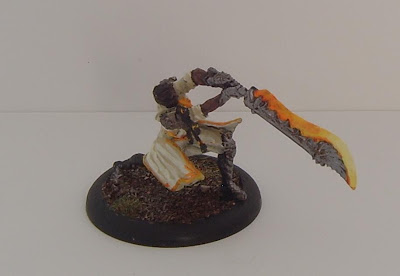
    This is Griever a Level 70 leader class character for the Empire faction and personal guard to the Empress herself. He is surprisngly lightly armoured for an Empire character of this level leaving me with only a small amount of metal to paint.

    Metal is quite easy to paint, but quite hard get looking great. I tend to rely on dry brushing with games workshop metals over a black undercoat, working up from Boltgun metal to Mithril silver and using less paint at each stage. The end result looks presentable, but hardly stunning. Some people do wondrous things with metals, but I have never quite been able to get the hang of it.

    I am pretty pleased with his robes. I used Privateer Press (the makers of Warmachines and Hordes) Menoth base and highlight for this. Purely because I got the cheap in my FLGS (Friendly Local Games shop). The base is kind of beige, while the highlight is an off white with a faintly yellowish glow. I like them because it can be quite hard to paint white without it looking light grey, which can be good but isn't always the effect that you want.

    I am pretty pleased with the effect on the sword blade which was done by layering lighter shades of yellow until it was almost pure white. I have never had the patience for blending, but this has come out quite well.

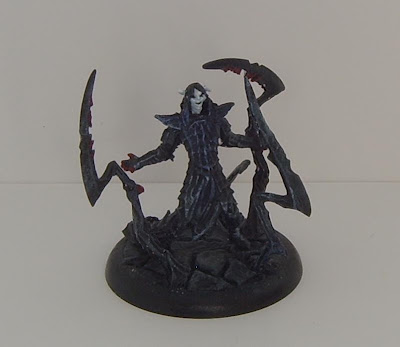
    Ophiel is the leader of the Dark Samael, a Magneto to Dinah's Professor X. I am very happy with the base, which was made by scoring a layer of 'green stuff' (modelling putty) and painting it black. Ophiel was tough to paint because he is mostly black with pure white skin. With the heavily textured armour I resorted to drybrushing, but am not one hundred percent happy with the result.

    The skin was a nightmare. With such pure white shown on his box illustration I had nowhere to go for highlighting and the end result looks rather underfined. I already repainted the face once, but I may have another go. Good enough for the table, but not my finest hour.

    Much happier with this guy. Tsubasa Kuokami is a freelance samurai how is depicted in all red. This involved a lot of red highlighting with white to off set it. The differences in shades can be quite subtle, but I am pretty satisfied with the end result. I am using him as something of a test case for my 'Red Devil' Samurai army, of which I hope to show more soon. Certainly this guy will attract attention on the battle field.

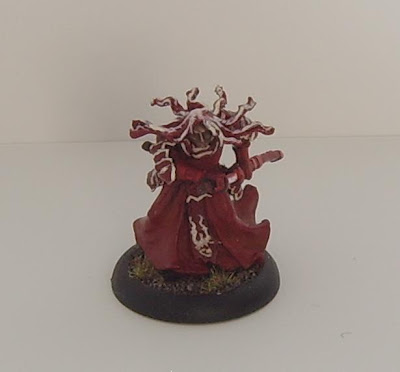
    A quick shout here for Janiel, another light Samael. I don't think this picture does her justice as the more subtle changes of tone on her face don't come out very well. Of course that only means I am a bad photographer rather than a bad painter. Still, I am pleased with the colours, which were hard to get right.

    The model of Janiel doesn't look much like her card picture, the model has far more frills. So she was tough to get right, but the end result is quite striking. I have never really painted a model quite like this before, most of mine have tended towards more warlike clothes and poses, so she was a bit of a change.

    I hope to have more Anima stuff soon. I have a few more models to show off as well as a scenario and, with luck, a battle report. I also have some tiny samurai to show off.

    Sunday 19 April 2009

    Anima Models

    Below are a few of the models I have been painting for the fantasy skirmish game Anima: Tactics.

    For people unfamiliar with the game, it is set in the world of Gaia, which may or may not be a future Earth. A world in which advanced technology once existed, but has largely been lost except for recovered artifacts referred to as 'lost loggia.'

    The game is very small scale, each miniature acts independently and, so far, all miniatures represent individual, unique, name characters (a range of more generic 'agents' are on the way, but essentially each miniature is an individual). Characters have levels rather than points, but it works much the same way with characters so far varying from 35 to 80 levels. 200 - 300 is a rough scale for the game, so most games use no more than half a dozen models at most.

    This is definitely a strength, because the models are quite pricey for what you get. An average model come individually packed in a blister for about £7. For that you get the model, some counters and a two cards, one with the rules for the character and the other with either additional rules or an 'artifact' or team card. You can also get larger models in boxes for £12 to £25, but other than the size you still get the same cards and counters. Size does not, incidentally, correspond to levels.

    Fortunately, the game works very well at the small scale demanded. Characters have action points, represented by counters. They recover a certain number each turn (usually 3), and can carry a maximum number (4 or 5). Action points not used can be carried over from turn to turn, meaning this is essentially a game or resource management. When a character activates they can use their points to perform basic actions, walking, running, attacking, etc, or special actions listed on their card. They can also perform 'reactive action' in response to the enemy, such as dodging, so it pays to hold back a few points.

    It's all very tactical, as you work out good action combos to use, and plays pretty quickly. The unique models are also fun. The game has a manga-ish style to it which gives additional appeal to me.

    Anyway, on to the models. I don't claim to be a great painter. Good enough for the table is my goal. That said, I have improved a great deal over the years and these models probably represent some of the best I have, personally, painted. That they are all individuals helps as I can focus a lot of time and effort in each one and treat it as a seperate 'unit.' When painting for larger scale games such as Warhammer I have to adopt a more 'production line' approach.

    These are my models from the Empire faction. From the left Janus Faith, Daniella Meris, Lord General Yuri Olsen, Duncan Reid and Claire Adelheid. Since I took this picture I have added Vayl and Griever to my collection but haven't gotten around to photographing them yet.

    The Empire are a former great power in decline who have been revived, somewhat, by the young Empress Elisabetta. They are a pretty straightforward bunch. They are tough, do quite a bit of damage, but don't have a lot of support powers and don't rely much on special tricks.

    Models in Anima can belong to factions or be 'wanderers' with no faction. All characters have an alignment: light, dark or neutral. When choosing a force you can select models by alignment (no mixing light and dark) or faction, in which case you can add one 'mercenary' wanderer. The Empire is mostly a light faction, with two dark and one neutral so far, suggesting they are, crudely, the good guys.


    Janus Faith was the first Anima model I painted, I am not particularly proud of the job I did on his face, I have gotten a lot better at that, but am pleased with the armour detail. I think it stands out rather well and gives him quite a striking look.


    Lord General Yuri Olsen is a leader level character. You can only have one leader in a 300 level game. The armour follows the same style is Janus and helps to give a consistent look to the Empire. I am quite proud of the cloak, even though when examined up close the pattern is a little shaky.


    The Samael faction here. From the left Dark Cheshire, Shinigami Ayl, Konosuke, Kairos and Bael.

    The Samael are a mixed faction of supernatural and fantasy beings. They seem to have a role similar to the mutants in marvel comics. They divide pretty neatly into light and dark. The Dark Samel, represented by the miniatures above seek to overthrow humanity and are lead by the fallen Angel Ophiel, who I think of as Magneto. The Light Samael are lead by fallen Angel Dinah and are closer to the X-Men, seeking to live in harmony with humans. Of course that's often easier said than done.

    They are fiddly faction, fast and hard hitting but with weak armour and little staying power (with the exception of the monstrous Konosuke at the back, though he can't dodge which weakens him a bit).


    The aforementioned fallen Angel Dinah here, accompanied by her spirit guardians Lucera and Umbra. I am very pleased with the white colours on these models. I picked up two cheap pots of white and white-ish paint from Private Press and they work wonderfully for this ivory effect. The alternative would have been a kind of gray which I don't think would have suited Dinah as well.


    I am very proud of the effect of this model of Dark Cheshire. I always try and paint my models in the style they appear on their character cards. On his card Cheshire is stepping out of the shadows and most of his body is silhouetted. I tried to recreate this effect and was quite please with the result. I tried photographing against a black backdrop, but the effect was no very successful with too much reflection. I will have to work on my photography before trying again.


    I am including this picture of Bael because I am quite pleased with both the skin tones and the light effects on her latex boots, which was done with a simple line of light grey paint. I think she looks rather striking with the combination of feathers and latex.

    Since taking these pictures I have painted a few more models and will post more pictures when I get the chance. I also have a couple of scenario ideas and a battle report to upload, so stay tuned for more Anima stuff.