But, I felt the need to put the campaign to bed before moving on to my next project (of which more soon hopefully) and so I finally got motivated to write up the Scenario and play the game.
In previous instalments, the Monks of the Temple of Ro-Kan investigated strange goings on at Shimoda village. They found the village largely abandoned and were attacked by Oni. Having seen off their attackers, they learned from a badly wounded survivor that the rest of the villagers had been taken into the mountains.
Meanwhile, the captive villagers attempted to break free from their Bakemono jailors, but with half their number defeated only managed a draw.
As Game 3 begins, the Monks, accompanied by a surviving villager, have made their way to an old shrine in the mountains. The Savage Wave plan to sacrifice the villagers in order to defile the shrine. In game terms, this meant a shrine in the middle of the table with an idol at each corner (for a total of four). The Savage Wave earn scenario points for placing a captive on an idol, and the Temple get them for rescuing them. Both sides can also earn points for holding the shrine. As with most Bushido scenarios, the side with the most Scenario points gets a victory point at the end of turns 2, 4 and 6.
You can find the complete details of this scenario, along with scenarios 1 and 2 here:
https://www.scribd.com/doc/277160925/Bushido-Campaign-the-Shrine
On to the game

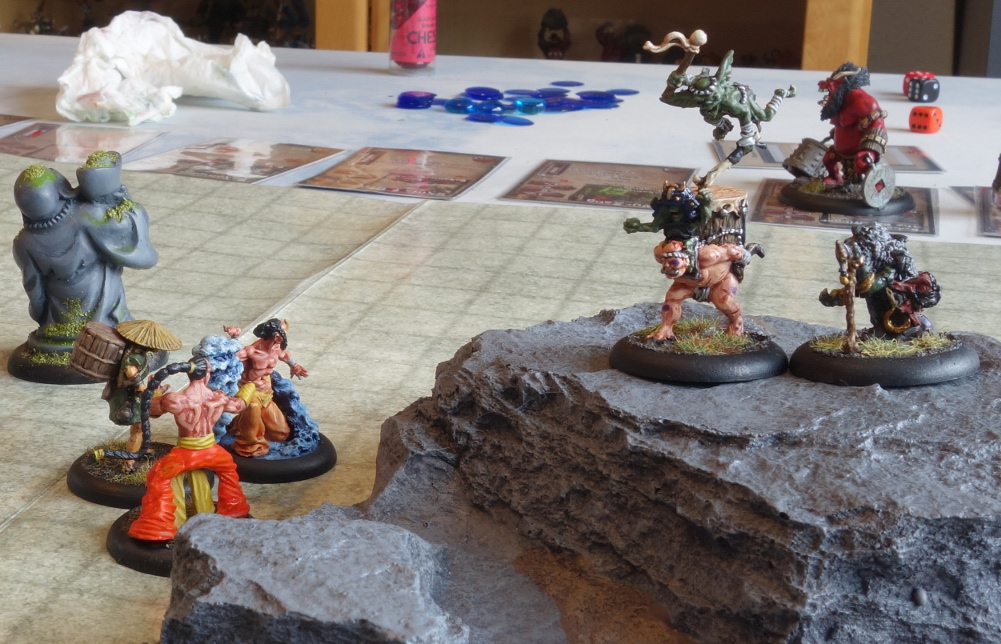
Deployment
Turn 1
Both sides split their forces, The Bakeomono made their way over the rocks, taking advantage of their camouflage ability (which makes them invisible in cover) and summoning more of their number as they went. The Monks Riku and Kenko, and the peasant Atsuko, went to meet them.

Meanwhile, Suchiro, Hotaro, Aiko, Gori and the Earth Kami went the other way to face the Oni Zuba and Bobata and their human slave.

Turn 2
The advance continued with Kenko and Riku approaching the Bakemono. Riku summoned a wall of water to protect them from the Bakemono arrows.

Gori and Hotaru faced Bobata while Suchiro secured the shrine for the Temple. But Zuba's placing of two captives on the friendly idol, meant that both sides had 2 scenario points each and neither side got a victory point.

Turn 3
Bobata went down, but took Gori with him and the slave, seeing an opening and coming down from an Oni blood high, took out Aiko.

Kenko and Riku fought Zuba and the Bakemono. Despite Wu Zang's curses, the monks held their ground thanks to Atsuko's healing ability. Meanwhile, Suchiro rescued the captives Zuba had placed on the idol.

Turn 4
The Oni slave outran Hotaru and the Earth Kami to place a captive on the far idol, while the Bakemono archers made their way around the front of the shrine to help him.
Zuba and the Monks battle was still inconclusive. Zuba took damage but still held out. At the last moment Hotaru secured the shrine. The Temple had 6 scenario points, 4 for freed captives and 2 for the shrine, while the Savage Wave had 3 for the captive on the far idol. The Temple scored a victory point.

Turn 5
Hotaru and the Earth Kami attacked the slave, preventing him from placing any more captives while Suchiro ran to help. The slave was badly wounded, but a combination of good luck and wound sustained from fighting Bobata allowed the slave to bring down Hotaru.

The Bakemono archers, now accompanied by a beater approached the far idol.

Despite Wu Zang's curses rendering Riku slow and weak, the Monks still defeated Zuba.
Turn 6
Suchiro freed the captive placed on the far idol, but the Bakemono beater and one of the archers placed two more, while the third archer tried to secure the shrine.
Wu Zang twice attempted to curse Kenko without success and he was able to defeat a Bakemono, but it was too late to make any difference.
Fortunately for the Temple, Riku was able to secure the shrine and defeat the Bakemono archer.

The Temple scored 6 scenario points for freed captives and 2 for the shrine, for a total of 8, while the Savage Wave scored only 6 for captives on the far idol.

Victory in this game and this campaign went to the Temple of Ro-Kan.
No comments:
Post a Comment