Wednesday 29 May 2019

Shadow War Campaign Final Mission Part Two

Part Two of my report on the final mission of my Shadow War Campaign. Part One, covering the mission rules and deployment is here.

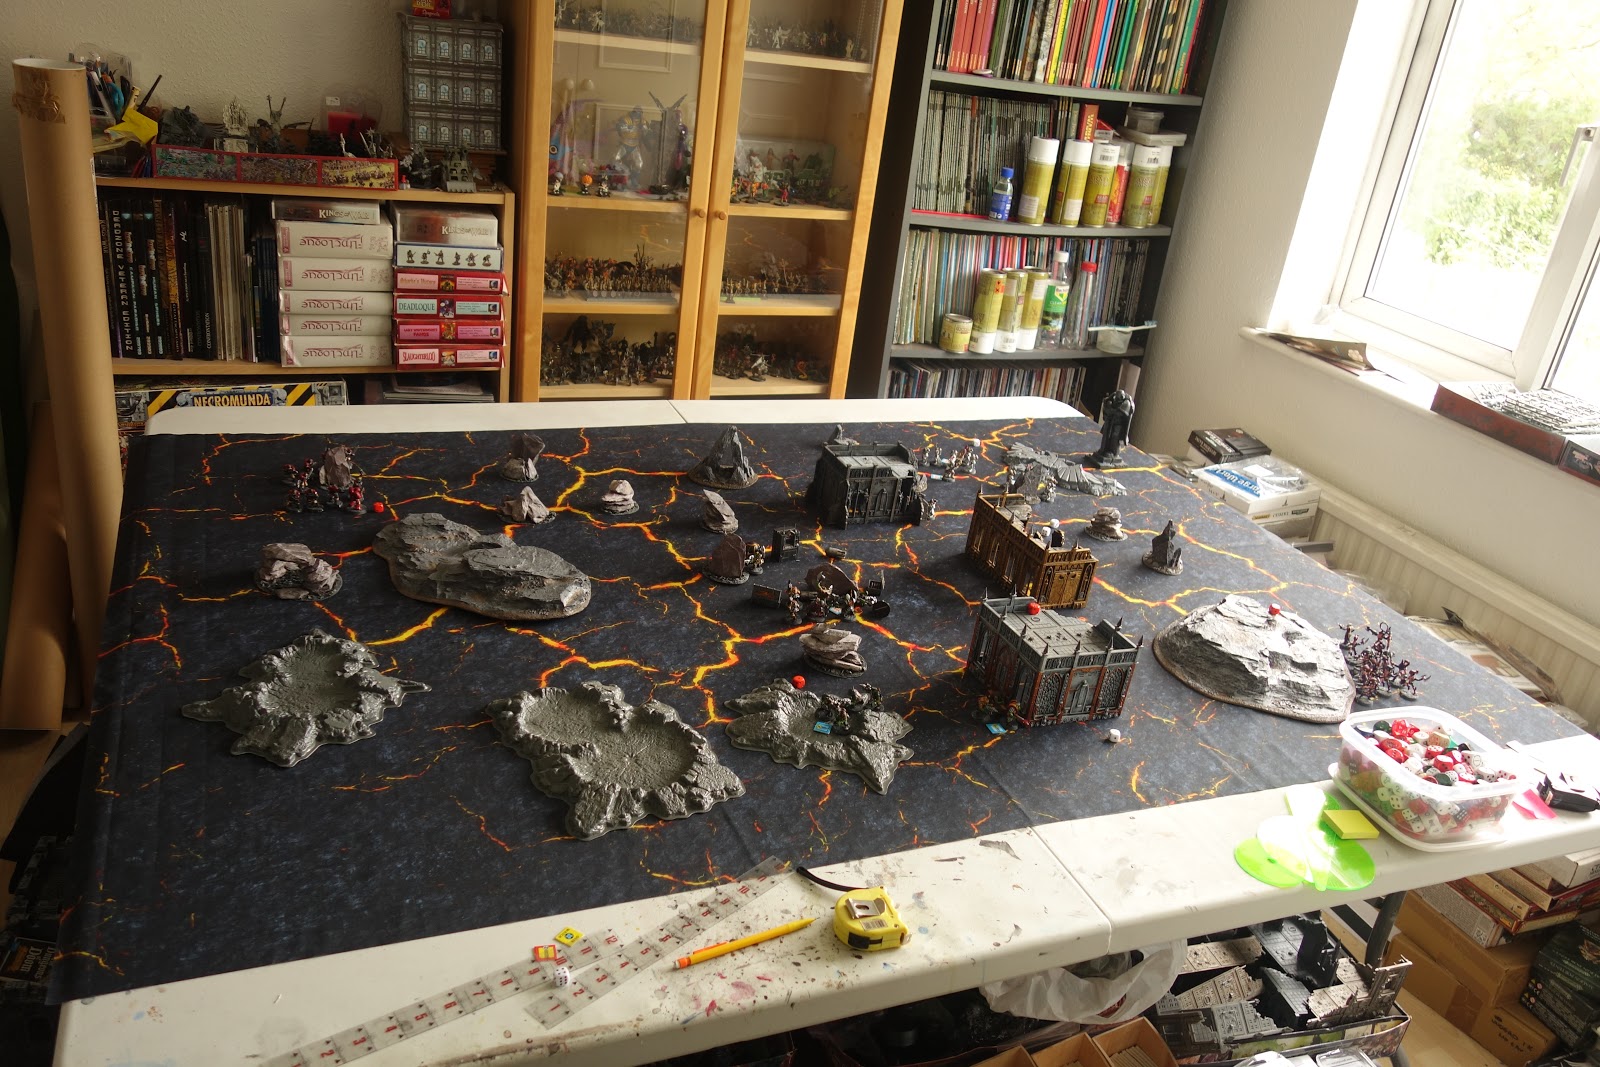
The Orks took the first turn and advanced quickly, swarming over the archeotech.


The Sisters of Battle advanced more cautiously, sending out a scout ahead while the rest followed on.


At the end of turn 1, the Dark Eldar and Blood Angels arrived, deploying on opposite sides on the far left and near right.


The Dark Eldar quickly found themselves under heavy fire from the Orks.


While the Sisters broke off part of their forces to pursue this new threat.


The Orks had seized much of the archeotech, but were now under heavy fire from all sides.


And at the end of the turn the Chaos Space Marines and Tau arrived.


The Sisters poured fire on to the Chaos Marines, doing no damage but keeping them pinned.


Meanwhile, the Seraphim seized their primary objective.


Despite being delayed by the Sisters and Orks, the Dark Eldar continued their advance.


While on the left, the firefight between the Orks and Tau was developing in the Tau's favour.


The Dark Eldar started to push through to the centre.


The Orks still had much of the Archeotech, but struggle to move it under fire from the Tau, Blood Angels and Dark Eldar.


Meanwhile, on the far side of the field, both the Chaos Marines and Sisters of Battle were pursuing the same objective. Most of the Sisters Kill-Team provided covering fire, while the Seraphim handed off the Data Bank to Sister's Ursula and Beatrice. The Sisters had little luck overcoming the Chaos Marines high toughness and armour, but while they were all pinned they couldn't advance.


Enough Orks had been taken down or out of action that the Dark Eldar were able to seize their primary objective, the weapons cache, and start to make progress towards their deployment zone.


The Tau were in difficulty. Their primary objective was the same as the Dark Eldar and they needed to move at top speed to get it, but they had to go through the remnants of the Orks to get it.

I hadn't considered, when planning this scenario, that the Shadow War rules require you to shoot at the nearest target unless a more distant target is easier to hit. This meant the Tau couldn't prioritise the Dark Eldar over the nearer Orks, even though killing Orks didn't help them achieve their primary goal.


But by the end of turn 5, enough Orks had recovered to make a decent go at recovering the Doomsday Device. They might not be able to take the bulk of the archeotech as they had hoped, but they could still achieve their primary objective. The Blood Angels and Dark Eldar had also secure their primary objectives, but were struggling to move them under heavy fire.


But it was the Sisters of Battle who would take the lead, carrying their primary objective off the battlefield first. Because they were second on the leader board, this meant that any Kill Team other than the Orks would need 4 Victory Points to beat them and win the campaign.


And that seems as good a place as any to take a break. We'll see how the other teams got on trying to catch the Sisters in part 3.

Sunday 19 May 2019

Shadow War Campaign Final Mission Part One

When I last posted about my Shadow War campaign it was December 2018, I had just completed round 5 and four of the six Kill Teams had gathered the 10 data caches I had decided was necessary to finish the campaign. Since then, I let things go quiet, partly because I got absorbed in my Blood Angels and Death Guard painting project and partly because I needed the time and space to bring the campaign to a suitably climactic end.

The original Necromunda Campaign rules, on which Shadow War's rules are based, had nothing to say about actually ending a campaign. You simply continued to play games and build up your gang until everyone died, got bored or grew out of wargaming entirely.

Shadow War improved on this by introducing victory conditions using its concept of Promethium Caches. Once one Kill Team collected 15 caches, if they won one more mission they would win the campaign. So far, so basic. For my campaign I changed the Promethium Caches to Data Caches and reduced the required number for victory to ten. But I never wanted to end the campaign or just another basic mission, I wanted something suitably climactic to round every thing off and provide a proper sense of closure. I wanted nothing less than a no-hold barred, all against all, six way Kill-Team mega fight.

But doing this was going to take time and space. As may have been apparent from previous mission reports, I usually played Shadow War on a 4' x 4' space that took up just over half of the table in my hobby room. This allowed me to clear enough space for a game by just pushing everything else to one end of the table. But for a six team fight I needed more room. That meant utilising the whole table. Also, if a normal game of Shadow War between two Kill Teams took me a couple of hours to play through a six team game was going to be a lot longer. So I also had to wait for a completely free weekend.

A six way finale needed its own special rules. Plus, I also needed to give some advantage to the currently winning Kill Teams or the rest of the campaign would have been pointless. With that in mind I devised a scenery in which six valuable pieces of archeotech would be placed near the centre of the table. I also allocated six deployment zones. The Orks and Sisters of Battle, as the two Kill Teams at the top of the leader board would deploy first, giving them first shot at collecting the archeotech. The Dark Eldar Wyches and Space Marine Scouts would arrive on turn 2 and the Chaos Space Marines and Tau on turn 3. When they deployed, each team would be randomly allocated a specific piece of archeotech to be their primary target, which would be worth 3 victory points and the rest would be worth 1 each. The goal of each team would be to get as much archeotech of the table through their deployment zone as possible and, because this was the final mission, no-one would bottle out.

The rule rules I devised for the scenario are here.

This is the table layout. After Five rounds of cityscapes I wanted things to try a different battlefield look. And, with six teams to keep track off, plus assorted special operatives, I didn't want too much crazy terrain and certainly not any high vantage points that would allow any team to dominate the game with long range shooting.

This was the final table layout.


The Orks choose a deployment zone on the centre of the near side. This left them vulnerable to attack on two fronts, but also gave them the most direct route to the archeotech. This was a calculated risk, but the hope was that they would be able to use their superior numbers to defend each flank. Unfortunately, their primary objective was the doomsday device, which was on the far row of archeotech.


The Sisters took the deployment zone on the far right side, hoping to use the extra mobility of their Seraphim to seize their primary objective, the data bank.

Deployment was complete and battle was joined. We'll see how it went it part two.