Wednesday, 23 January 2019

The Great Rebellion

If you go back and read my blog posts from 2018, you'd be forgiven for thinking that I didn't do anything hobby related last year except play a few games of Shadow War. In fact, last year was pretty productive for me, I just got pretty bad at updating the blog. Rather than posting new pictures to the blog, I got into the habit of Tweeting things, which meant a few people saw them, but also that they disappeared pretty quickly into the ether.

So for no better reason than that I wanted a record, this is an update of one of my major projects of 2018, the two English Civil War companies I painted to use with the Pikeman's Lament rules, written by Daniel Mersey and Michael Leck and published by Osprey. This game is supposed to represent small actions with roughly 30 to 50 models aside.

I first posted about this project in March 2018. My plan was to paint up my two companies while continuing with my Shadow War campaign, occasionally breaking from ECW models to update my Kill Teams. In the end this is pretty much how it worked out and I managed to finish two complete companies of 24 points each, each made up of five units.


I started with my Royalist Company, who were based on the Marquis of Winchester's regiment Civil War re-enactors. The regiment they recreate were part of the garrison of Basing House, a now ruined Tudor Manor that's a short walk from Basingstoke and which I have visited a few times when the re-enactors have been in. They're supposed to be a well equipped company, hence the armoured Pikeman, but as they were mostly fighting a siege, they don't have any cavalry. My first unit was made up of Warlord Games metal armoured Pikeman, but with a plastic command group, including my company office in his nice green outfit. In game terms, I treat them as Veterans, which puts their point costs up to 6.


The Pikeman are supported by two units of shot, each worth 4 points each. I organised the plastic musketeers into one marching unit and one standing and firing. However, I didn't like the fact that the firing unit were all firing at once, so I added some metal reloading models. I have since discovered that at least some shot units did carry engage in mass volley fire, but I've painted them now, so tough.


This is a unit of Commanded Shot, skirmishers designed to hold up or disrupt the enemy advance. They are a mix of plastic and metal models I pinched from the Warlord Dragoon box. I also added the sniper with the long gun on the end. I was very keen to use him, because there is a long hunting musket on display at Basing House that may have been used in the siege. In rules terms I treat this unit as veterans, which means they don't suffer a -1 to hit if they skirmish (moving and shooting). This doesn't really represent a sniper very well, but there aren't really any rules in Pikeman's Lament that do, so it will have to do. Maybe, because he can shoot at a longer range, it gives him plenty of time to get up and move. The Veteran upgrade takes the unit to 4 points.


Finally I have included a heavy gun, worth 6 points, which has an engineer model added (he came in the same pack as the sniper). I like to imagine he is a foreign mercenary, hired for his expertise with gunpowder weaponry, hence his expensive yellow outfit and darker skin tone.

I have scattered a few black-British models in with the company. I don't know if this is historically accurate or how many black-British soldiers fought in the Civil War, but there were black-Britons as early as Tudor times, so I imagine the answer isn't "none." Also, every time a costume drama casts a black actor you get a few racists on Twitter or message boards complaining about "political correctness" which seems as good reason as any to include them.

The cannon is worth a mighty 6 points.

My second company are Parliamentarians, who represent men from Sir William Waller's regiment, who besieged Basing House in 1643. According to this website they wore yellow coats and carried a blue flag.


The infantry consists of one unit of Pike and one of Shot, though these are just standard units worth 4 points each.

I painted the models in both companies in much the same way. I gave them a spray undercoat of Army Painter Chaotic Red for the Royalists and Dessert Yellow for the Parliamentarians. I kept the detail simple, with one shade and one highlight with a second highlight for faces and skin, though I took a little more time over command groups. I gave most models matching coats, but tried to vary other colours because soldiers would have mostly worn their own clothes. I mostly kept to dull, earthy shades as tis was the era before chemical dyes.


I included a unit of Dragoons, mounted infantry that would move about on horseback and dismount to fight. Unlike many Pike and Shot rules, the Pikeman's Lament doesn't require you to include two sets of models, one on foot and one mounted. Instead it recommends a mix of mounted and unmounted models. Warlord's Dragoon box includes 12 mounted models and 12 on foot, which gave me plenty of spares. I plan to pain up some more to represent a Royalist Dragoon Unit at some point, but I still had a few left over to use for my Royalist Commanded Shot unit. I particularly like the model who's kneeling down to reload.

The Dragoons are a bit of a cheat. Apparently Waller's own regiment started out as infantry and were later mounted as Dragoons, so I have taken a bit of a liberty with history by including both in the same company.


My final infantry unit is a group of Forlorn Hope, which in Pikeman's Lament are small, elite units worth 6 points. These are represented by Warlord's plastic Firelock Musketmen, though I used a few spare hats from the infantry to give them some variety.


Finally, I have a unit of Parliamentary Cavalry, lead by the company Officer. Cavalry can be either Trotters, who advance slowly and fire pistols at medium range, or Gallopers who move at maximum speed and engage with swords and pistols at close range. I made this unit Trotters as that style is more associated with Parliament, though, in reality, I don't know how Waller's regiment would have fought. The Officer doesn't represent Waller himself, but one of his subordinates. The flag is based on the actual regimental flag, which I found online, scaled down and printed out.


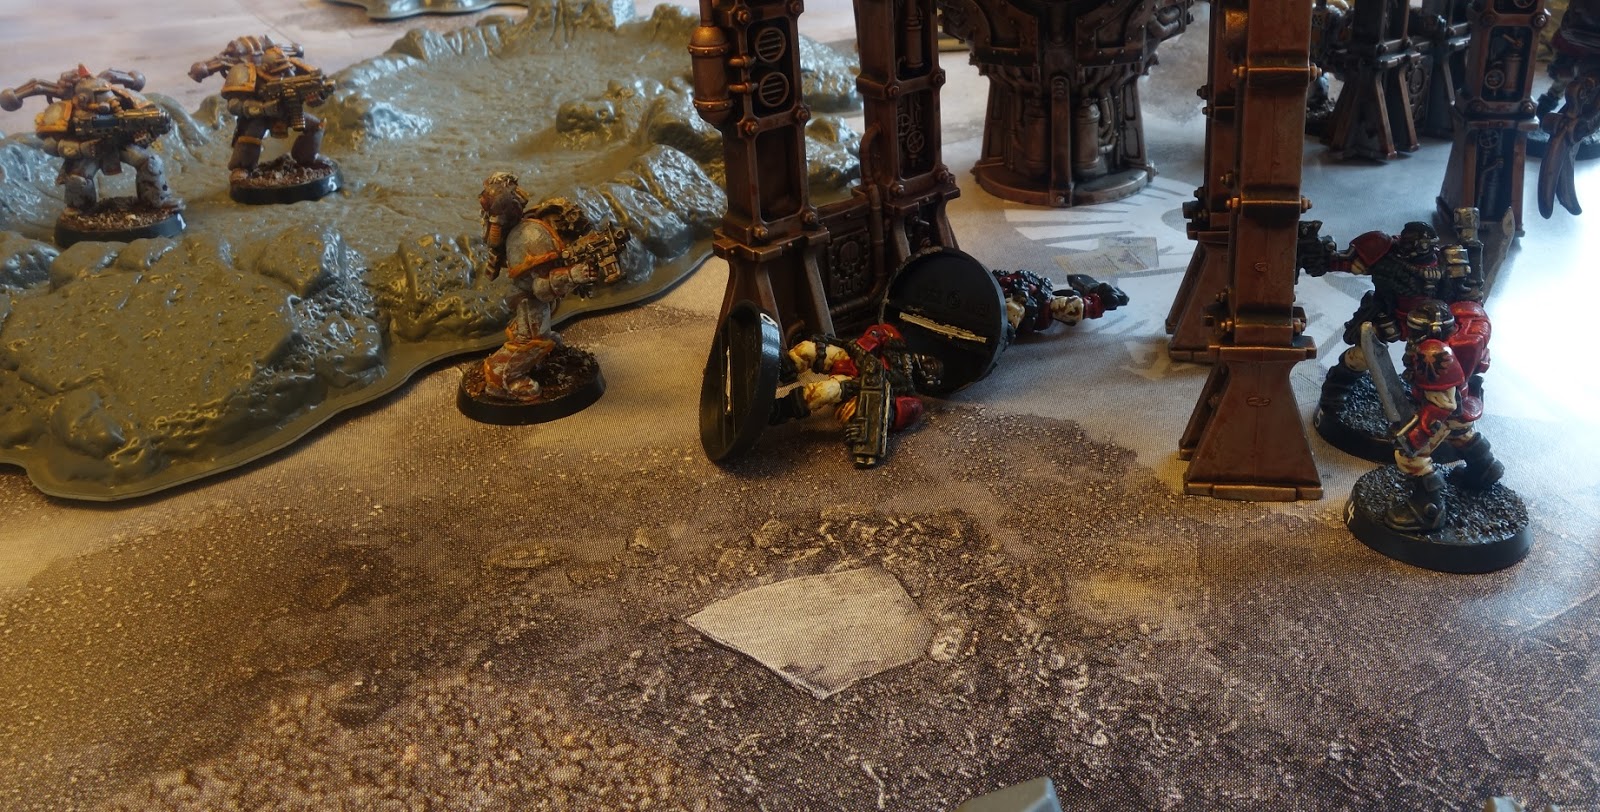
Here are some pictures form a quick game I played to test out the rules. The Parliamentarians attempted to break the Siege by advancing through Marsh Land to attack a vulnerable spot in the Royalist defences.

The game was a lot of fun. The rules are very similar to Lion Rampant and Dragon Rampant and units have to pass tests in order to activate, with them being more likely to activate if they're ordered to do something they are comfortable with (it's easy to get musketeers to shot than charge, for example). Both sides suffered there fair share of failed orders, but in the end Parliament triumphed, though their office was killed by a lucky shot.

It's definitely a set of rules I would like to play again and there are plenty of different scenarios in the book to try out now that everything is painted.

I plan to be better at posting project updates this year, so, hopefully, the next post will not be such a massive info dump.

Sunday, 30 December 2018

Shadow War - Round Five

I've been very slack about updating the blog lately, but that isn't because I haven't been gaming. With the new year just round the corner, I thought I would rush to the end and summarise the whole of Round Five before the new year. Belt up, it's going to be a bumpy ride.

My plan was for this to be the last normal round of the campaign. After this I only want to play one final fight which will involve all six teams and settle the overall winner of the campaign. But that's going to take a fair bit of time and planning, so probably won't happen for a little while yet. This round will be crucial though, as it will establish the final leader board, which will determine which teams have the advantage in the final fight.

Game 5a - Wyches vs Sisters of Battle

I rolled up the Ambush scenario with the Sisters as Defenders. The Sisters took up a defensive position on top of the Promethium Refinery. This gave them a good vantage point, but, unfortunately for them, all the Sisters had to deploy in the centre, with none of them able to deploy anywhere else on the table.


Thanks to their accompanying Haemunculus (and the fact that I remember the rules) the Wyches got two rolls on the combat drugs table giving them +1 to both Weapon Skill and Toughness. They relied on the toughness boost and their speed to avoid the worst of the bolter fire and get under the promethium refinery.


Despite this, they still suffered some casualties as Hexar and Syren Cyrix were both downed, Melris was flesh wounded and Selkis pinned.


Having weatherd the worst of the fire, the Wyches were able to scale the ladder and engage in hand to hand where they excelled. The Sisters held their own at first, but couldn't bring their fire power. It didn't help that Sister Superior Winnifred failed her fear test in the face of Hyldar's horrible scars, keeping her out of the fight for a turn.


Meanwhile, the Sister's attention was diverted by the Haemonculus taking pot shots at them from the walk way.


The Sisters held out in hand to hand as long as they could, but were overmatched by the Wyches.


Then Syren Cyrix recovered to flesh wound and joined the fight, the Sisters were not just outmatched, but outnumbered.


Soon it was all over and the Sisters bottled.


This was a confident win for the Dark Eldar, who gained 3 Data caches, putting them at the top of the table. The Sisters gained 1 Data cache but, tragically, Sister Hildegarde died, causing their Kill Team rating to drop. Rather than recruit a new Sister, the Sisters choose to recruit a Seraphim for the final round. The Dark Eldar had already paid to keep their Haemonculus for two games, so recruited a Succubus as well!

Game 5b - Blood Axe Orks vs Chaos Space Marines

I made a silly mistake setting up the scenery in this scenario. I left far too much open space in the centre of the table, allowing both side to take pot shots at each other from right across the other side of the board. This would have a nasty impact on the game. The scenario was a straight Kill-Team fight, chosen by the Plague Marines because it didn't give the Orks any additional numerical advantage.


Both Plague Marines and Orks set up sentries at key vantage points on opposite sides of the table.


Meanwhile, with the centre of the table exposed to fire, Sergeant Bogrot lead a flanking force to try and out sneak the Chaos Marines.


Meanwhile, the Orks and Chaos Marines took pot shots at each other from across the battlefield.


The Chaos Marine Champion Brother Corpulous lead a group down the centre of the table, relying on their sheer toughness to keep them safe. This worked up to a point, as a pattern emerged in which the Orks would hit and pin the Chaos Marines, but completely fail to wound them.


Sergeant Bogrot's flanking force were distracted shooting at Brother Corpulous' advance party in a bid to stop them advancing up the table. This worked, but lead to deadlock as neither side were able to actually hurt the other and their was no incentive for either side to do anything other than shoot each other and hope their luck changed.


Finally Brother Leprous took up a better firing position in an attempt to break the deadlock.


He was quickly taken out by Fragrap's flamer, but at least that put Fragrap in the firing line of Brother Pox and he was taken down along with Razan.


Most of the flanking force were now stuck, keeping the Chaos Marines pinned.


But Sergeant Bogrot continued his original plan single-handedly, sneaking his way around the rear of the enemy lines.


With the game having dragged on for nearly ten turns, the Orks tried something desperate as Korporal Frix and Dagroll broke cover to try and get into better firing positions.


Finally Sergeant Bogrot was in a position to spring his trap, just as Brother Pox was downed by Big Shoota fire from Snagrip.


Amazingly, both Brother's Scrofula and Buboes fled in fear from Sergeant Bogrot's horrible scars  (which he picked up all the way back in round 1) one after the other, and he was able to finish off Brother Pox before following up and taking out Brother Scrofula.


With Dagroll locked in combat with Brother Corpulous, but still holding his own and the Orks now having overwhelming numerical superiority, the Chaos Marines bottled.


This game dragged horrendously because of my silly mistake with the scenery. Both sides could see and shoot each other, but had no luck wounding, so most of the first six or seven turns were spent in futile dice rolling. I actually considered giving up on the game half way and treating it as a draw, but in the end I took a break for a day before carrying on afresh.

This was the Ork's fourth win, giving them a clear lead in simple victories. They found two data caches, putting them on 10, joint top of the leader board. The Chaos Marines were left on seven. The Orks recruited a freebooter for the final round, while the Chaos Marines kept their Terminator, not that he had been much use in this game.

Game 5c - Blood Angel Scouts vs Tau

After my chronic mistake in the last game, I set up the scenery to off no clear firing lines. The scenario was another ambush, with the Blood Angels defending and, with the Promethium Refinery in the centre. The Tau rolled "it's quiet" on the event table, while the Space Marines rolled "Fear and Confusion" which meant both sides would have to add one to their bottle rolls.


The Scouts mostly set up on the refinery, but placed a few at ground level, to stop the Tau sneaking underneath. They weren't going to make the same mistake as the Sisters, not that they knew anything about that.


Meanwhile, Novices Marco and Angelo were able to deploy behind the Tau lines. Though this was a high risk strategy, leaving them exposed to fire if they didn't win the first turn.


They didn't win the first turn.

Novice Marco was quickly taken out and Angelo pinned.


However, the Tau opening salvo was pretty blunted only Brother Niccolo took a wound and the Veteran was taken down by Ree'va's Rail Rifle.


Brother Sergeant Antonio and Brother Paolo used hip-shooting to run and shoot, while Brother Sebastiano advanced. Sebastiao took out Bry'ch and Brother Fillipo took out Tri'spa.


Shooting from on top of the Promethium refinery Brother Michael managed to miss on a 1 when he needed a 2, while Brother Raphael managed to hit and downed Gen'tu. With two fighters OOA and one down, the Tau managed to fail a bottle check, rolling an 8 which became 9 thanks to “Fear and Confusion.” The Space Marines won after only one turn!


If it hadn't been for the last game, I might have fudged the bottle roll and let the game continue, but, as it was, I was just relieved to not have to play for ten turns. The Blood Angels found 3 data caches, which put them on 10 as well, redeeming themselves after their recent run of failures. The Blood Angels retained the services of their veteran while the Tau recruited a Cadre Fireblade for the final round.

With round five at an end, the leader board looks like this:

Kill Team
Data Caches
Wins
Losses
Team Rating
Orks
10
4
1
2064
Adeptus Sororitas
10
3
2
2154
Dark Eldar
10
2
3
1963
Space Marine Scouts
10
2
3
1785
Tau
8
2
3
1743
Chaos Space Marines
7
2
3
1881

It's a surprisingly balanced result with four teams on an equal number of Data caches and every team having at least two wins. Only the Sisters and Orks have managed to pull slightly ahead, and, in the former case, this was as much luck as judgement.

The Dark Eldar have finally managed to pull themselves back up, now that I figured out how to use them, while the Tau's impressive fire power hasn't actually translated into wins in a lot of cases.

I'm taking a bit of a break from Shadow War while I work out the details of the final scenario and finish off some other painting, but hopefully I'll have something suitably epic for the new year as the Kill Teams finally uncover the archive or Inquisitor Rudolphus.

Sunday, 28 October 2018

Shadow War - Blood Enemies

For the first time in the campaign, Loyalist Space Marines faced Traitors as the Blood Angel Scouts fought the Plague Marines. The scenario was a straightforward Kill Team Fight. Both Kill Teams would try to break the other, with the first to bottle lose. The Blood Angels were one man down as Novice Marco's old battle wound kept him out of the fight.

The Blood Angels deployment made best possible use of cover....

...while the Plague Marines advanced through relatively open terrain relying on their superior toughness and armour to keep them going.

In fact, this proved unnecessary as both sides shooting bounced ineffectively off each other's armour.

The Plague Marine's implacable advance continued until they reached the Promethium Refinery in the centre.

The Blood Angels were pressed hard on both flanks.

But the Plague Marines still struggled to bring any scouts down, simply pinning them behind cover.

On their right flank, the Blood Angels held up, despite concerted fire by the Plague Marine Champion.
But on their left flank, the Scouts started to push back hard.


The Scouts right flank started to give, although they made the Plague Marines pay for each inch of ground.

But on the Scouts right flank pushed back hard as first one...

...then two fell in close combat. The fight seemed to be turning the Scout's way only for them to suddenly fail a bottle test. The Plague Marines had won the day.

This was a quick and dirty fight in which neither side had a clear advantage. Both sides were pretty level until the end when things started to look up for the Blood Angels, but with both sides having lost enough troops to bottle it was just as likely that either side would fail.

Despite winning, the Plague Marines only won one Data Cache, which seemed only fair given the narrow victory. The Scouts suffered no serious casualties, while Brothers Pox and Rancid were left with old battle wounds and Brother Legionela “suffered” Horrible Scars (causes Fear). For the next round the Scouts recruited a Space Marine Veteran and the Plague Marines a Chaos Terminator.

This fight marked the end of Round Four and at the end of the round, the results looked like this:

Kill Team
Data Caches
Wins
Losses
Team Rating
Adeptus Sororitas
9
3
1
2257
Orks
8
3
1
2064
Tau
7
2
2
1697
Dark Eldar
7
1
3
1805
Space Marine Scouts
7
1
3
1730
Chaos Space Marines
6
2
2
1881

The Adeptus Soritas still held the field, with the Orks snapping up behind them, though the Dark Eldar had leaped ahead leaving the Plague Marines trailing.

According to the official rules, Shadow War campaigns are supposed to be played until a Kill Team gets 15 Promethium Caches. I had originally planned to reduce this number to 8, but decided to go to 10 as this would leave one more round and mean every team would have faced every other. Round Five would be the final round and would see the following line ups:

Adeptus Sororitas vs Dark Eldar
Orks vs Chaos Space Marines
Tau vs Space Marine Scouts

Although Round 5 would be the regular round, but I still have something special in mind to finish off the campaign.